Normal view

There are new articles available, click to refresh the page.
Before yesterdayMain stream

What is a GPU? Everything you need to know

A brown-black GPU floating on a black background

The GPU is one of the most important components of any PC, as it’s not just required for high-end graphics performance, but also for being able to generate an image, whether it’s your Windows desktop or a 3D world in a video game.

In fact, a GPU isn’t just important for your computer, as even your smartphone, tablet and smartwatch will have some form of GPU.

Whether you’re looking to upgrade your PC, or simply want to learn a little more about your device, this is our comprehensive guide on the GPU, covering why it’s so important and what factors you need to consider before a purchase.

What is a GPU?

A GPU, or a Graphics Processing Unit, is a computer component that can create images. Any device that creates images on a display (such as a laptop, tablet or smartphone) will have a GPU.

Without a GPU, a device would be unable to create any on-screen images, rendering it as useless as a doorstop.

What does a GPU do?

GPUs are responsible for creating images, scenes, and animations on a device, but having a more powerful GPU will accelerate the rendering of 3D graphics, making them useful for many different workloads.

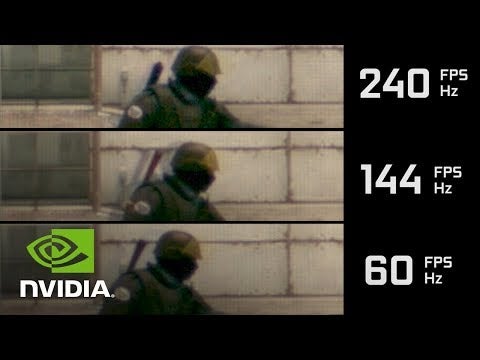
While every smartphone, tablet and laptop will feature a GPU of some form, they’re mostly associated with gaming. That’s because you generally need a powerful GPU to run games at a smooth performance, as the PC component is tasked with creating lots and lots of animations in a matter of milliseconds.

GPUs are required to render multiple complex animations at the same time, which comes in handy not only for gaming but for creatives that are looking to render 3D models or edit video. For example, the MacBook Pro has a more powerful GPU than most laptops since it’s created specially for digital artists and designers.

GPUs are also used in data centres, which enables the likes of cloud gaming, video encoding and video streaming, as well as bitcoin mining.

Essentially, a GPU has a massive influence on everything you see on your screen, and the quality of a GPU is one of the biggest differentiators between the MacBook Pro and MacBook Air.

What is an iGPU?

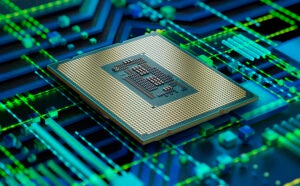
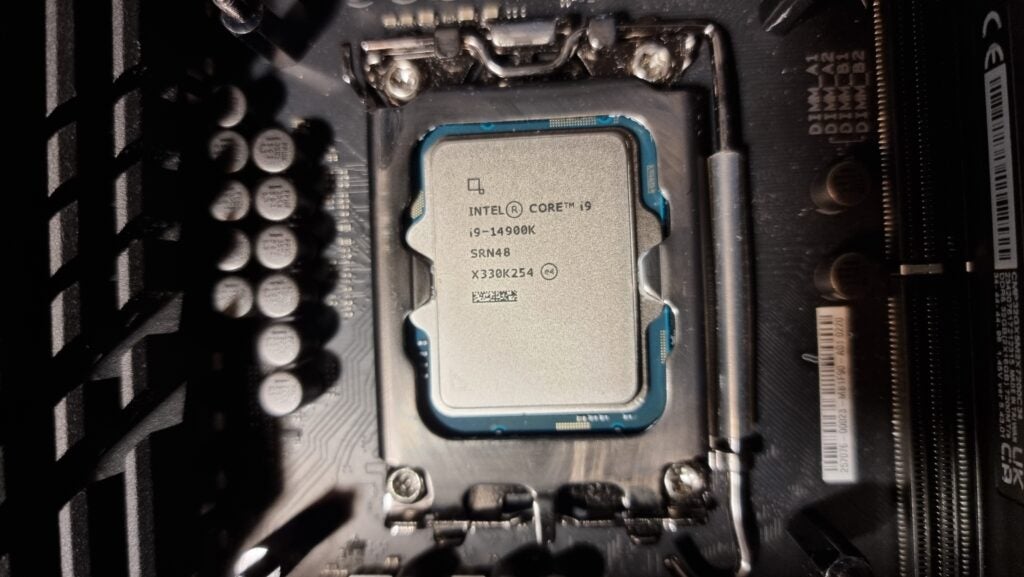
There are two main types of GPUs, with an iGPU (or Integrated Graphics Processing Unit) being built inside the main processor rather than being a separate chip to the CPU.

These types of GPUs are generally less powerful than discrete GPUs, and are usually developed for basic rendering tasks and generic productivity work, rather than gaming and 3D animation.

The GPU inside the Apple M4 chip
Integrated GPU – Image Credit (Trusted Reviews)

That being said, companies such as AMD and Intel are working on improving the performance power of their iGPUs. Apple has also surprised many people with its Apple Silicon chips, particularly the Max and Ultra chips of its M range, which flaunt iGPUs so powerful that they can compete with high-end graphics cards.

It’s also worth noting that anyone looking to buy a new PC without a dedicated graphics card should check that it features an integrated GPU, as sometimes this isn’t the case. You’ll generally need either an iGPU or dGPU for your PC to run, as otherwise it will be incapable of generating any images.
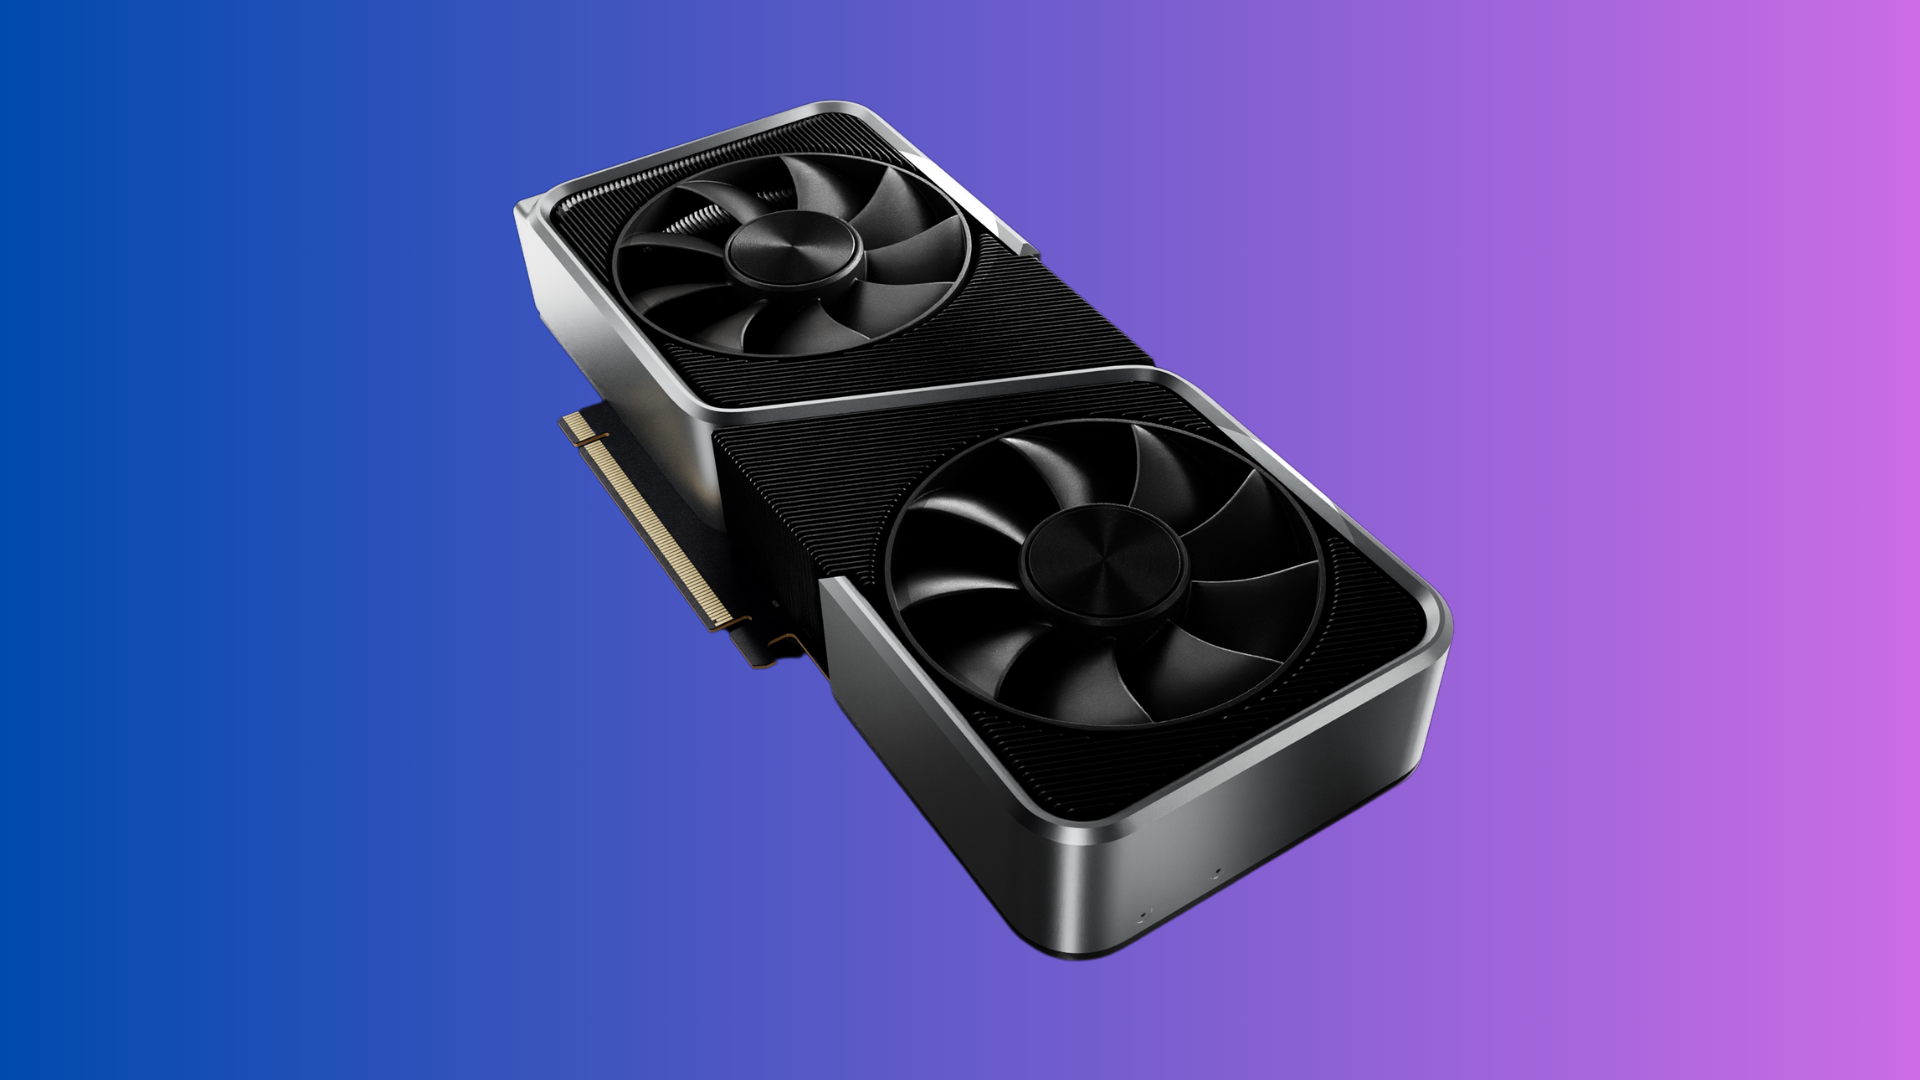
What is a dGPU?

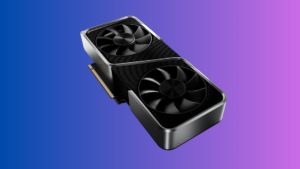
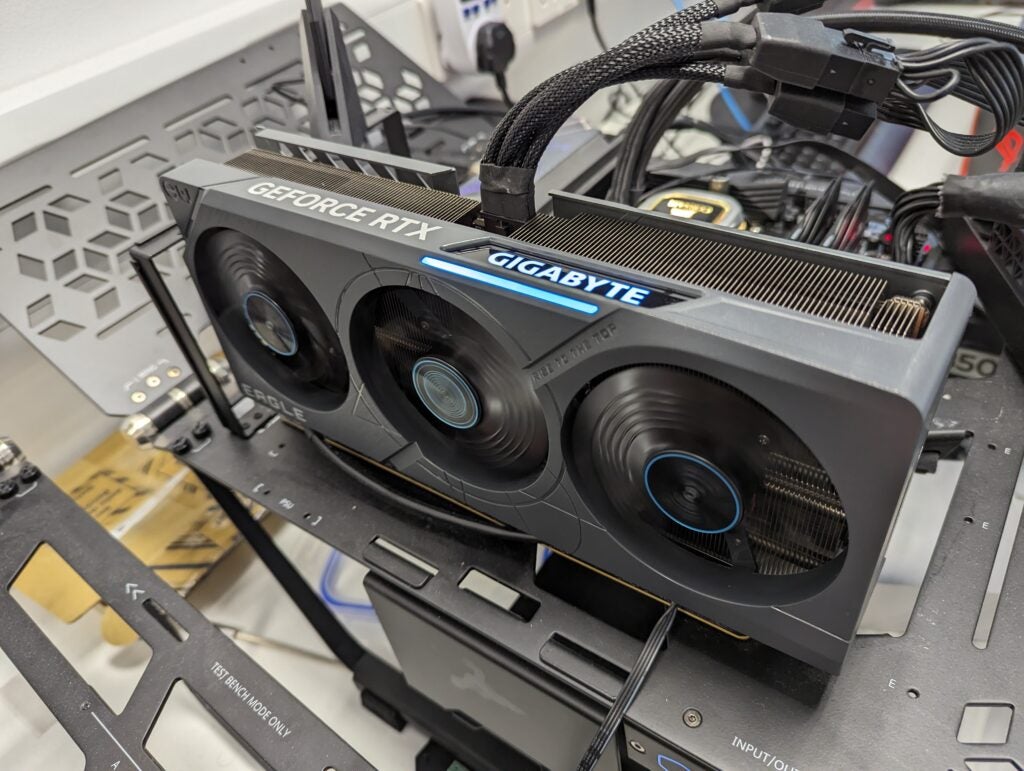
The second variation is the dGPU, also known as a Discrete Graphics Processing Unit. A dGPU is usually found inside a graphics card for a desktop system, though it can be a dedicated chipset in high-end laptops too.

A discrete GPU is usually a lot more powerful than an iGPU, as it specialises in rendering advanced graphics for the likes of content creation or gaming.

If you’re looking to build a gaming PC, a powerful dGPU is essential for rendering high-quality images and scenes. Right now, the biggest names in the dGPU industry are AMD and Nvidia, although Intel has also launched its own GPUs in the form of Intel Arc.7

Nvidia RTX 4090 discrete GPU
Discrete GPU – Image Credit (Trusted Reviews)

Discrete GPUs do come with a catch however, as they require a dedicated cooling system to prevent overheating and to maximise their performance, which is usually why gaming laptops are so much heavier than traditional laptops.

dGPUs also have a higher power consumption, which means that gaming laptops will usually need charging more often than devices that come with an iGPU.

Plus, discrete GPUs can boost the price of a laptop significantly, which is why they’re only usually recommended if you’re going to be gaming or creating content. It’s arguably the most expensive component of a PC.

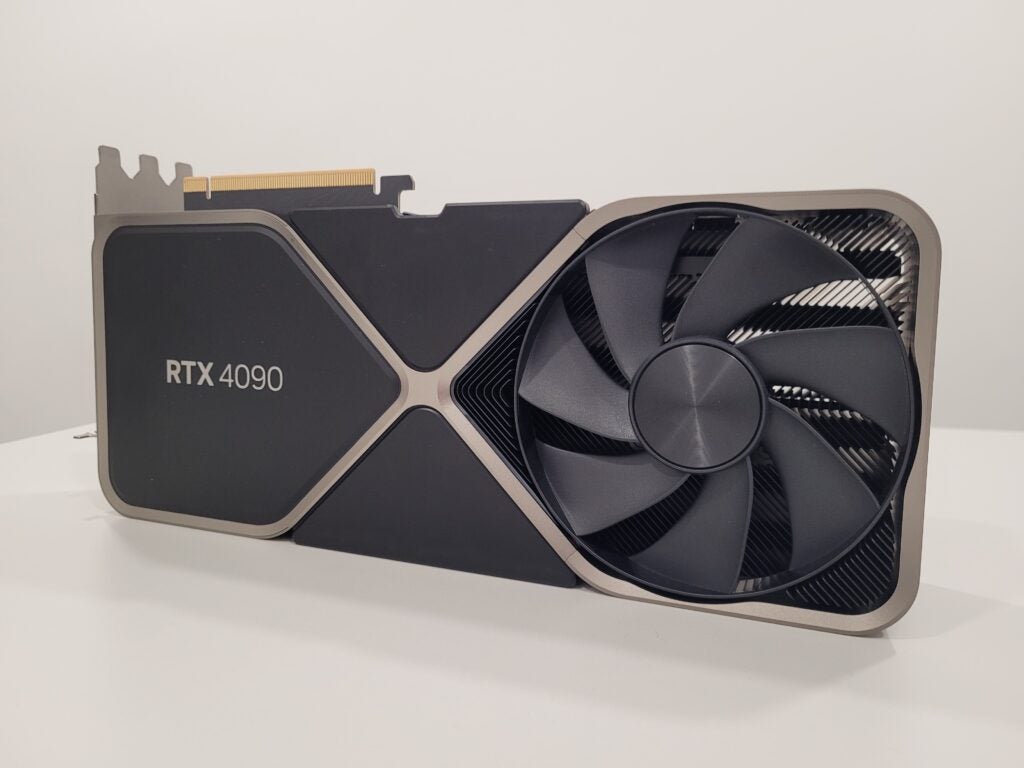
Is the GPU the same as a graphics card?

While the terms GPU and graphics card are often used interchangeably, they are not the same thing.

A GPU is the chip that is doing all of the heavy lifting, and can be found inside a graphics card.

The graphics card is an ‘expansion card’ that enables the GPU to connect to the motherboard. Graphics cards will also have built-in fans to help cool down the GPU when under stress, as well as their own dedicated RAM.

In essence, the graphics card is the house that a GPU lives in, helping it to connect to the rest of the computer, in a similar relationship to a CPU and a motherboard – the former providing all of the processing power, while the latter sorts out the logistics.

Due to the size of a graphics card, they’re typically only found in desktop PCs. A laptop will instead feature a GPU chip that plugs directly into the motherboard, with each laptop manufacturer developing their own cooling system instead.

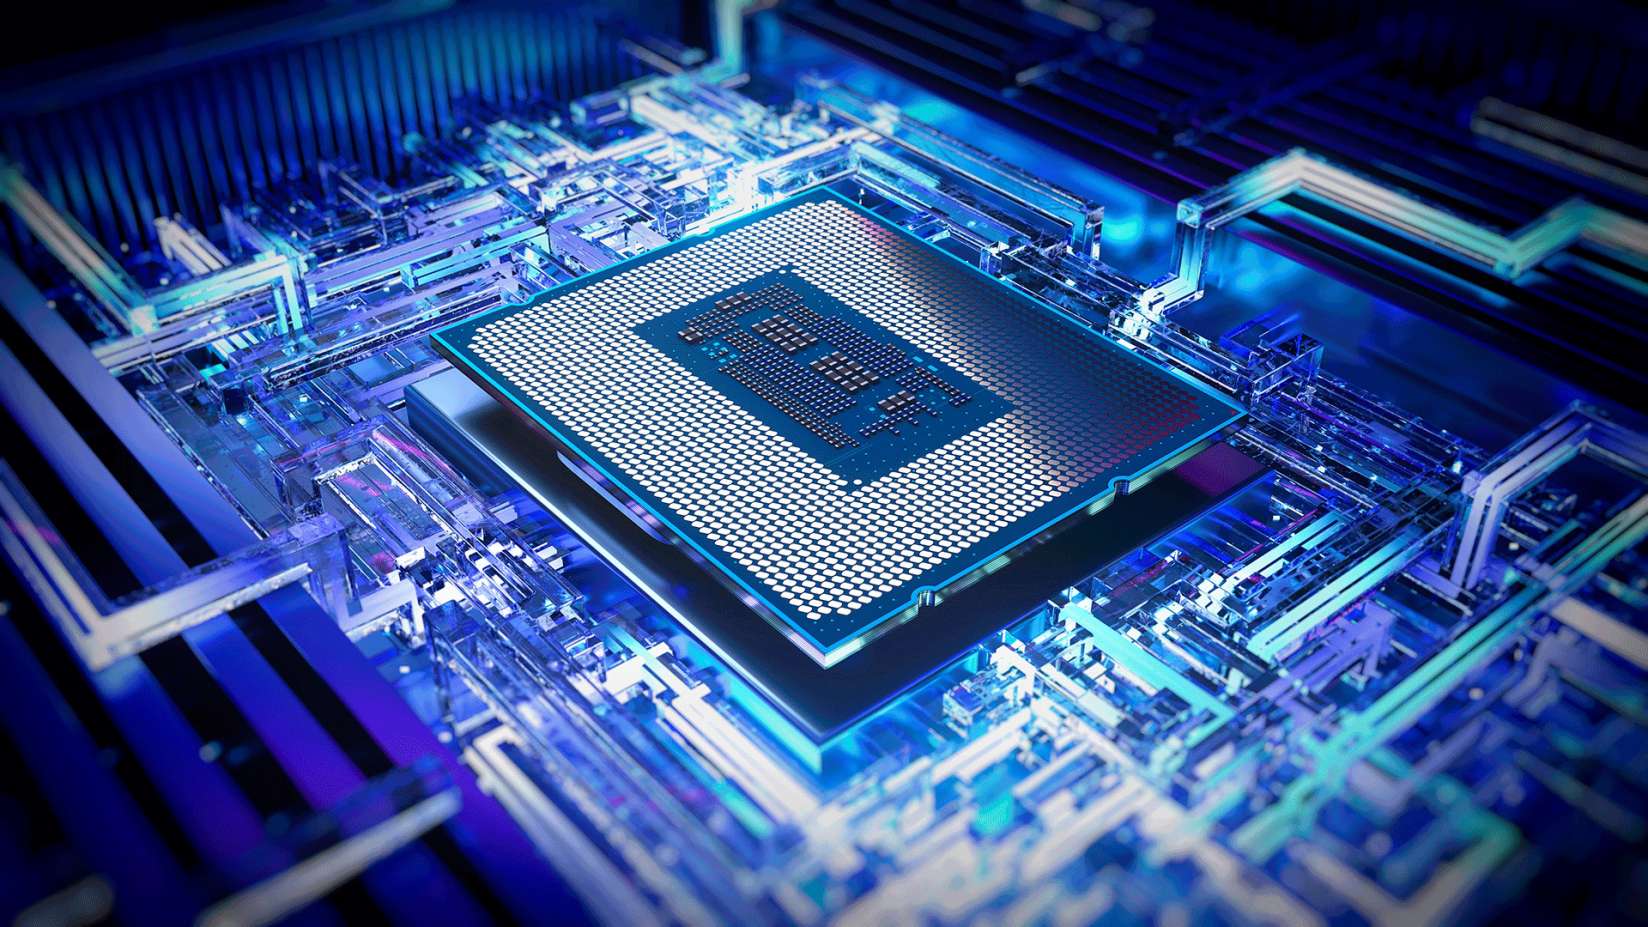
Is a GPU better than a CPU?

We wouldn’t say that the GPU is better than the CPU or vice versa, as they both perform different jobs. While a GPU is tasked with generating images for a device, the CPU is instead responsible for processing and sending out instructions to all of the other components in an electronic device.

Without a CPU, a GPU wouldn’t be able to perform its job, making both components incredibly important. Both will often be baked into the same chip, especially for small, portable devices such as a smartphone. But even when a CPU and GPU occupy separate chips, they’re still able to communicate with each other effectively.

Depending on your desired workload, you may want to target different performance levels for each chip. A CPU’s performance will affect almost every workload, although you only really need a high-end performance for complex workloads and when juggling multiple tasks simultaneously. Meanwhile, a powerful GPU will generally have a greater impact on gaming performance than the CPU, while it can also have a major influence on the likes of content creation.

The post What is a GPU? Everything you need to know appeared first on Trusted Reviews.

How to promote a standard user account to an admin account on macOS

MacBook Air M3 angled on table

By default, the first user that sets up a Mac will become an administrator. If you share your Mac with others and want to give them admin access then you can do this quickly and easily.

Once you promote a standard user to an administrator account, they’ll be able to add and manage other users, install apps and change settings. Admins can also demote any other existing administrators if they no longer need their privileges. 

Follow the steps below to learn how to promote a standard user account to an administrator account on Mac. 

What you’ll need:

  • Mac
  • Access to the administrator account

The short version:

  1. Open the System Settings app on your Mac
  2. Select Users & Groups from the left sidebar menu
  3. Click the info icon next to the user’s name
  4. Toggle on Allow this user to administer this computer
  5. Enter the admin’s password
  6. Select OK
Kindle Paperwhite Summertime discount

Kindle Paperwhite Summertime discount

Amazon’s super-light Kindle Paperwhite has just become even more of a bargain

  • John Lewis
  • Save £30
  • £119.99
View Deal
  1. Step
    1

    Open System Settings on your Mac

    We’ll be demonstrating on a Mac that’s running on the MacOS Sonoma 14. If you are running on macOS Monterey 12 or below then scroll down to our Troubleshooting section and follow the steps listed there. 

    To open System Settings, either look for the above app icon in the bottom panel or in the Launchpad, or select the Apple menu in the top-left of the screen and then choose System Settings.
    System Settings Apple app icon

  2. Step
    2

    Select Users & Groups from the left sidebar menu

    You may need to scroll down to find this option. Otherwise you can search for Users & Groups in the search panel at the top of the sidebar. 
    Mac Settings app open with Users & Groups option highlighted

  3. Step
    3

    Click the info icon next to the user’s name

    The info icon is a lowercase i in the middle of a circle. Clicking this will open a pop-up window with more options about the select user’s account.
    Apple Mac user with info option highlighted

  4. Step
    4

    Toggle on Allow this user to administer this computer

    Once you turn this toggle on, you’ll be prompted to enter the admin account’s password.
    User account on Mac with Allow this user to administer this computer toggle highlighted

  5. Step
    5

    Enter the admin’s password

    Enter the password for your Mac here and then select Unlock. You may be told that you need to restart your computer at this point.
    Users & Groups on Mac with enter admin password option

  6. Step
    6

    Select OK

    Once you’re happy with the new admin, click OK. If you weren’t prompted to restart your Mac earlier then make sure you do soon after you click OK.User account on Mac with Allow this user to administer option turned on, and OK highlighted

Troubleshooting:

What are the steps if I’m running on macOS Monterey 12 or older?

Although fairly similar, the steps slightly differ if you’re using an older version of macOS.

Enter your Mac’s System Preferences, select Users & Groups then click on the padlock at the bottom left to unlock the preference pane. From here, choose the user you’d like to add as an administrator and select Allow user to administer this computer.

How do I remove someone as an administrator?

Follow the steps above but turn off Allow this user to administer this computer. You may need to restart your computer to let the changes take effect.

The post How to promote a standard user account to an admin account on macOS appeared first on Trusted Reviews.

How to use Google Gemini in Google Chrome: A new shortcut revealed

How to use Google Gemini in Google Chrome

Google Gemini, the company’s ChatGPT competitor, is becoming prevalent across the company’s suite of services, from Gmail to Google Docs and even the Chrome browser thanks to a new update.

The update makes it easier than ever to access Google Gemini and get personalised answers to your burning questions, no matter how niche they might be. It works in a similar way to regular Google searches in the browser, but now with a little bit of GenAI secret sauce.

It was already relatively easy to access Google Gemini by going to the Gemini website, but this new browser update makes it even faster for Chrome users. 

Without further ado, here’s how to use the new Google Gemini shortcut in Google Chrome on PC and Mac. 

What you’ll need: 

  • A PC or Mac
  • Google Chrome Version 124.0.6367.119 or later

The Short Version 

  1. Open Google Chrome.
  2. Type @Gemini in the search bar.
  3. Select Chat with Gemini.
  4. Enter your search query.
  5. Get the information you need.
  1. Step
    1

    Open Google Chrome

    The first step is to open Google Chrome on your PC or Mac and make sure that it’s up to date. You’ll need version 124.0.6367.119 or later to use the new Google Gemini integration in the browser. Open the Chrome browser

  2. Step
    2

    Type @Gemini in the search bar

    In the search bar, type @Gemini.Type @Gemini in the search bar

  3. Step
    3

    Select Chat with Gemini

    From the list of suggested websites and search queries, select Chat with Gemini.Select Chat with Gemini

  4. Step
    4

    Enter your search query

    Enter the question you’d like answered directly into the search bar – no need to go to the Gemini website. Once you’ve typed out your question, hit the Enter key to submit.Enter your question

  5. Step
    5

    Get the information you need

    You’ll then be taken to the Gemini website to get the answer to your question, and you can ask any follow-ups if necessary.Get Gemini to answer your question

Troubleshooting

The Gemini prompt doesn’t appear when I type @Gemini in Google Chrome. How can I use it?

It sounds like you’re running an older version of Google Chrome. Tap the Three Dots in the upper-right corner of the browser, and if there’s an update available, you’ll be prompted to install it. 

The post How to use Google Gemini in Google Chrome: A new shortcut revealed appeared first on Trusted Reviews.

High-end vs mid-range CPUs: Is the difference worth the cost?

Buying a new CPU for your PC can be an intimidating process, not only because of all of the technical specs that you need to consider, but also the high expense.

One of the most common questions that people ask is whether they should purchase a mid-range or high-end processor. The likes of AMD and Intel will always launch multiple chips for each generation, all with different price points. So which one should you go for?

We’ll be explaining everything you need to know about purchasing a CPU, so you can be more confident that you’re purchasing the right processor for your desired workloads. 

What is a high-end CPU?

Let’s start with defining what a high-end processor actually is. In terms of Intel chips, the i7 and i9 ranges are generally thought of as the high-end options. Over at AMD, it’s the Ryzen 7 and Ryzen 9 chips. But what exactly is it that makes these chips high-end? 

Intel Core i9-14900K in motherboard
Image Credit (Trusted Reviews)

Generally, high-end chips have more cores and higher peak clock speeds, making them the most powerful options. For example, the high-end Intel Core i9-14900K features 24 cores and is capable of up to a 6GHz frequency. Meanwhile, the mid-range Intel Core i5-14600K has 14 cores and a max clock speed of 5.3GHz.

Thanks to those extra cores, high-end processors are generally more equipped to deal with juggling multiple tasks at once, or engaging in complex workloads such as video editing and 3D animation. The higher frequency speed will also provide a boost to overall performance.

What is a mid-range CPU? 

A mid-range processor is generally just a slightly less powerful version of its high-end counterpart, as long as they’re part of the same generation.

Intel Core i5-14600K being tested in a PC
Image Credit (Trusted Reviews)

For example, any processor in the latest 14th generation of Intel Core chips will share the same architecture. But when comparing two chips from differing generations (14th Gen vs 11th Gen for example) there will most likely be fundamental differences to how the chip was built, which can greatly impact performance. 

So if you’re choosing between two processors from the same generation (such as the i9-14900K and i5-14600K) then the only differences will be the peak frequency speed and number of cores. 

Is the difference worth the cost?

It’s obvious that a high-end processor is capable of a more powerful performance than its mid-range counterpart (as long as they’re part of the same generation) but is the performance difference actually worth the cost? This all depends on the workload.

The greatest advantage a high-end processor will have over a mid-range one is a greater number of cores and threads. However, many applications aren’t designed, or strenuous enough, to take advantage of numerous cores simultaneously. 

For example, web browsing, video streaming and word processing are such simple tasks that you most likely wouldn’t notice much of a difference between the performance of an i5 and an i9 processor. 

Strangely enough, most video games don’t require the power of numerous CPU cores either. This means that an i5 CPU will often be nearly just as competent as an i9 chip when it comes to elevating gaming performance. As a result, we often recommend gamers opt for a mid-range processor instead of a high-end one in order to get the best value for money. 

The benchmark table above demonstrates the performance difference between the Intel Core i9-14900K and Intel Core i5-14600K. As you can see, the former offers a superior performance, but not by a significant margin for modern games – there’s only 4fps advantage for Horizon Zero Dawn, 1fps boost for Returnal and 3fps gain for F1 22.

A high-end processor can offer a greater performance advantage for games that aren’t too restricted by GPU performance. For example, the i9 saw a 31fps performance boost compared to the i5 for Dirt Rally, although the performance was extremely high for both chips.

It’s also worth mentioning that all of the tests above are for a 1080p resolution. Crank up the resolution to 4K, and you’ll see an even smaller difference in gaming performance between the chips. Instead, it’s the GPU performance that becomes more important.

So does that mean there’s no point in buying a high-end processor? Not quite. A high-end chip will generally excel at workloads that make use of multi-threaded performance. This includes tasks such as video editing, 3D animation, machine learning and more. We typically recommend a high-end processor for creative professionals who deal with complex productions on a frequent basis. For such workloads, you should notice a big performance difference compared to using a mid-range chip. 

So whether the high cost of a high-end chip is worth it really just comes down to your workloads. Most people, including gamers, will likely be perfectly fine with a mid-range chip. But if you’re someone who deals with CPU-intensive workloads on a consistent basis, then the added firepower of a high-end chip will be worth it in the long run. 

The post High-end vs mid-range CPUs: Is the difference worth the cost? appeared first on Trusted Reviews.

How to optimise your gaming PC for better FPS performance

A high frame rate is highly important for PC gaming to ensure a smooth performance, especially for competitive games where extra frames can provide a significant advantage. 

One of the simplest ways to increase the frame rate performance is to purchase a more powerful graphics card, although this can be an expensive endeavour, and so isn’t a realistic option for many people. 

We’ve created this guide to help you improve your FPS performance for free, with some simple optimisations helping to maximise the power of your PC. Check out all of the steps below to find out how to boost your performance. 

And if you’ve tried all of the above and still can’t push up the frame rate to your desired level, then check out our Best Graphics Card, Best CPU and Best Gaming Laptop guides to consider a hardware upgrade. 

What you’ll need

  • A gaming PC

The short version

  1. Upgrade your graphics drivers
  2. Reduce the resolution 
  3. Activate DLSS or FSR
  4. Deactivate features such as ray tracing, Vsync and Anti-aliasing
  5. Ensure Game Mode is activated on Windows
  6. Configure your laptop’s power settings
  1. Step
    1

    Upgrade your graphics drivers

    The most important thing to do in order to optimise gaming performance is to update your graphics drivers. The likes of AMD and Nvidia are constantly releasing new firmware to keep its graphics cards optimised, so it’s important to keep your system updated. 

    If you own an Nvidia card, then make sure to download GeForce Experience, which will automatically download new updates for you. If you own an AMD graphics card, then download AMD Software: Adrenalin Edition instead. 
    Nvidia GeForce Experience

  2. Step
    2

    Reduce the resolution

    If your main priority is boosting frame rates, and you don’t mind if that means sacrificing visual quality, then reducing the resolution is a great way to boost performance. 

    Reducing the resolution will reduce the workload on your graphics card, allowing you to achieve a higher performance. This is why most eSport professionals will typically opt for a 1080p or 1440p resolution instead of 4K. 
    Lower resolution

  3. Step
    3

    Activate DLSS or FSR

    If you’re lucky enough to own an Nvidia RTX graphics card, then you’ll have access to its DLSS technology. This uses AI to boost the FPS performance of a game, and has been highly effective in the most recent range of GeForce graphics cards. The big caveat here is that not every game supports DLSS, and so is mostly reserved to newer titles. 

    If you don’t own an RTX card, then you should have access to AMD’s FSR technology instead. This isn’t quite as advanced as DLSS, but is still effective at boosting frame rate thanks to upscaling solutions, although can cause unwelcome artefacts to the game’s visuals. But if boosting frame rate is your priority, FSR is still a useful tool. 

    You can activate DLSS or FSR through a game’s settings menu. It’s worth using an FPS counter (available through Steam) to see what kind of effect they have on performance. 
    DLSS setting

  4. Step
    4

    Deactivate features such as ray tracing, Vsync and Anti-aliasing

    Graphics cards now make use of dozens of features to help video games look as realistic as possible. They’re excellent options for improving visuals, but they can often be a detriment to the FPS performance. Fortunately, you’ll be able to deactivate each feature through a game’s graphics settings menu. 

    Ray tracing is the big one to look for. This is a cutting-edge technology that improves the lighting, shadow and reflection effects in modern games, but it’s extremely taxing on the GPU, so deactivating it should see your performance improve. Some games will have it turned on by default, so it’s worth having a look. 
    Vsync is also a great feature for preventing screen tearing, but will restrict your FPS performance somewhat. Anti-aliasing will often by on by default too, as it helps to smooth out ugly jagged edges for in-game objects. Turning off both of these features should help to improve your PC’s performance. 

    It’s also worth checking whether you can reduce the draw distance in a game. This determines how much of a 3D environment will be rendered at one given time, with a high draw distance allowing you to view in-game environments and objects from a greater distance. Reducing this will of course ease the pressure on your GPU and increase performance. 
    Ray tracing deactivate

  5. Step
    5

    Ensure Game Mode is activated on Windows

    Game Mode is a highly useful tool built into Windows which will automatically disable background tasks on your PC while you’re playing a game. This will dedicate all of your PC’s resources to your game to ensure the fastest performance possible. 

    Game Mode is generally enabled by default, but it’s still worth double checking as it’s an easy fix. Simply search Game Mode in the Windows search bar, and slide the toggle to On. 
    Windows Game Mode

  6. Step
    6

    Configure your laptop’s power settings

    This step is specifically for gamers using a laptop or a handheld device, as it involves boosting performance to the detriment of your device’s battery life. On a Windows device, you can do this by going to Settings > System > Power & Battery > Power Mode, and then selecting Best Performance. 

    Certified gaming laptops will sometimes even have a Turbo mode which not only maximises performance, but also increases power to the fans to keep your system as cool as possible during such workloads. You will of course get an even better performance by making sure your portable is plugged into a power source.
    Power modes laptop

Troubleshooting

Which PC parts increase FPS?

The graphics card (or GPU) is the biggest influencer on FPS performance, so it should be at the top of your list of parts to upgrade. That said, upgrading your CPU and RAM can also have a positive effect on performance.

Is 60 FPS good for gaming?

A 60fps performance is perfectly fast enough for the vast majority of gamers. This is the performance you can expect from a PS5 or Xbox Series X. That said, those who want a competitive edge in the likes of first-person shooters will see the benefit of increasing the performance beyond 100fps.

The post How to optimise your gaming PC for better FPS performance appeared first on Trusted Reviews.

What is a USB to SATA adapter and when do you need one?

If you’re looking for an easy way to access data from an internal drive without installing it inside your PC, then a USB to SATA adapter could be your answer. 

Keep reading to learn everything you need to know about USB to SATA adapters, including what they are, why you might need one and what you need to know about transfer speeds. 

What is a USB to SATA adapter? 

A USB to SATA adapter is an adapter cable that connects an internal SATA hard disk drive (HDD) or solid-state drive (SSD) to a PC via an external connection.

Many SATA hard drives are designed to be installed inside your PC via a SATA cable. This makes it difficult to access the data on these drives without opening up your PC, especially if you don’t fancy replacing your system’s existing drive.

A USB to SATA adapter allows your PC to connect to the SATA hard drive via a USB connection instead. This means you can simply plug the USB cable into your desktop PC or laptop, and then gain access to all of the files stored on the drive.

When do you need a USB to SATA adapter? 

There are several scenarios in which you might find yourself in need of a USB to SATA adapter. 

By connecting an HDD/SSD to your computer using a USB to SATA adapter, you can quickly access the data on those drives. This means you can migrate data from one drive to another when replacing an old drive. 

USB to SATA adapters can also be used to perform backups and recover data, making it a handy adapter to keep on hand. 

For example, if a corrupted Windows file on your HDD/SSD prevents your PC from booting up, you may worry about losing all of the stored data such as documents, photos and videos. However, installing a fresh copy of Windows on a separate drive will allow you to boot up your PC, while using the USB to SATA adapter should enable you to also access all of your data on the old HDD/SSD and transfer the files over to the new one.

USB 2.0 vs USB 3.0 

One thing to bear in mind when picking up a USB to SATA adapter is the transfer speed.

For example, a USB 3.0 adapter will deliver faster speeds and greater bandwidth compared to a USB 2.0 adapter. This means they can transfer your data over significantly faster. 

It’s worth checking if your PC and HDD or SSD support the USB 3.0 standard (or higher) to determine whether you can take advantage of these speeds.

The post What is a USB to SATA adapter and when do you need one? appeared first on Trusted Reviews.

What is Intel Evo? Everything you need to know

Intel Evo

If you’re shopping around for a new laptop, you may have come across Intel’s Evo badge – but do you know what it means? 

We’ve compiled this guide to explain everything you need to know about Intel Evo, including its benefits, and where you can find an Intel Evo laptop. 

What is Intel Evo? 

Intel Evo is a certification process created by Intel. The Evo badge lets buyers know that a laptop has passed tests to prove it meets certain standards and criteria. These include a great battery life, lightweight design and consistent performance. 

This doesn’t necessarily mean that Evo laptops are the best of the best in terms of performance. Rather, Evo highlights laptops that offer top usability and battery life over a powerful GPU. 

This makes Evo-certified laptops ideal for students, office workers and everyday users, as opposed to content creators and hardcore gamers who require high-end performance specs. 

What are the benefits of Intel Evo? 

The Evo platform first launched in September 2020 as a replacement for 2019’s Project Athena. However, the specifications have grown over the years. 

Intel also offers several Evo badges, with the requirements varying depending on the badge. This means that not all of the following criteria will apply to every Evo laptop. 

As of the latest update to Intel’s Evo platform overview which was last reviewed in January 2024, Intel Evo laptops should wake from sleep in less than one second, and offer biometric login options, such as a fingerprint sensor, face recognition or Bluetooth phone proximity. 

Laptops should feature some form of AI noise suppression. Devices might also support Wake On Approach, Gaze-Based Dimming, or Walk-Away Lock if they’re fitted with the right sensors. 

Evo-certified laptops should offer at least 9.5 hours of battery life with a full HD display. They should also deliver fast charging capabilities via USB-C. 

Wireless connectivity should be fast and consistent with Wi-Fi 6E and 6 GHz support, along with Wi-Fi connection management from the Intel Connectivity Performance Suite 2.0. The laptop should also offer universal cable connectivity over USB-C with Thunderbolt 4. 

The hardware should also be up to date with a Full HD display, backlit keyboard, and precision touchpad. The laptop should have a thin and light chassis and the webcam should feature a resolution of at least 1080p at 30fps. The device should offer immersive audio and microphone tuning. 

Finally, the laptop should be powered by one of the following processors: 

  • Selected 11th through 13th Generation of Intel® Core™ i9, i7, and i5 mobile processors (laptop processors) with Intel® Iris® Xe Graphics
  • Selected Intel® Core™ Ultra processor
  • Selected Intel® Core™ processors (series 1)
  • Optional Intel® Arc™ or third-party discreet graphics 

You can find a full list of the laptops that carry the Intel Evo branding in our guide to which laptops are Intel Evo. This includes models from leading brands, including HP, Samsung, LG, Razer, and many more. 

Intel® Evo™ - Laptops. Evolved

Intel® Evo™ – Laptops. Evolved

Enjoy a premium laptop experience with the Intel® Evo™ range of laptops. Get the features you need to help you get it all done.

Check out the range at Intel

  • Intel Evo
  • Premium experience
  • From £549
Shop now

Why is Intel Evo important?

It’s interesting that Intel has put so much effort into creating Intel Evo, which is why we asked Melissa Gregg, Head of User Experience Research at Intel.

Gregg explained that Intel Evo will “allow computing to be accessible, understandable and relevant” for people who may not be as fluent in the technical specs of laptops. This means people can check for the Intel Evo badge instead of needing to dig into the specific specs.

Gregg also mentioned that Intel has done significant research to narrow down the requirements for Intel Evo. After testing user behaviour and looking into the software that people most often use, as well as what locations people use their laptops, the criteria were set.

In short, Intel Evo is a badge that is awarded to laptops that pass Intel’s own strict requirements, and these specifications have been specifically made for ultrabooks that prioritise on-the-go productivity.

The post What is Intel Evo? Everything you need to know appeared first on Trusted Reviews.

How to share big files with others over email

Credit: iStock

Need to share a large file over email but have been hit with an error message? This common issue can be incredibly frustrating, especially if you need to send important files as soon as possible.

Luckily there are a few ways to get around this limit and send large files over email, with the best way being to upload the files to a cloud service and then sharing this via email instead.

It might sound complicated, but it’s easy to do. Read on to learn how to do this and send up to 10GB of files instead.

What you’ll need

  • Email account, such as Gmail or Outlook
  • Access to Google Drive or OneDrive

The short version

  1. Open your email account
  2. Open a new email or reply to an existing email thread
  3. Click on the Drive icon
  4. Choose your file or folder to share
  5. Send your email
  1. Step
    1

    Open your email account

    We’ll be demonstrating using Gmail and Google Drive however the steps are fairly similar to Outlook and OneDrive too.Google services listed with Gmail option highlight

  2. Step
    2

    Open a new email or reply to an existing email thread

    Act accordingly depending on whether you want to send your files in a new email or continue an existing conversation. Regardless, the following steps are the same.
    Gmail compose new email button

  3. Step
    3

    Click on the Drive icon

    You’ll find this icon listed on the bottom panel of your message.
    Gmail new email message bottom panel with Google Drive icon highlighted

  4. Step
    4

    Choose your file or folder to share

    If you have already added files to your Drive then you’ll find them listed in My Drive. If not then you can simply upload your file at this point by clicking the Upload button (highlighted here) and selecting your files from your device.
    Gmail Google Drive screenshot with Upload option highlighted

  5. Step
    5

    Send your email

    Once you’ve chosen your file it will be placed in your email as a link. You may also receive this pop up which allows you to alter the permissions of the file, allowing readers to edit, comment or just view the files.
    Adjust permissions for access on Gmail

Troubleshooting

I don’t use Gmail or Outlook or would just prefer not to use Drive. Are there any alternative ways to share large files?

In short – yes, there are lots of other options. You could use an external service such as Dropbox or WeTransfer which both allow you to upload files and share links for free. 

There are limits to both and can be upgraded to paid subscriptions if necessary, however for the most part the free versions should be sufficient.

What is the maximum file size you can send over email?

It depends on the email account but it’s usually around 20-25MB, however by sending files through Drive or OneDrive you can send files up to 10GB instead.

The post How to share big files with others over email appeared first on Trusted Reviews.

How to benchmark your PC

Asus ROG Zephyrus G14 (2024) front

There are multiple reasons why you might want to benchmark a PC. You may simply be curious about its performance, or maybe you want to find a bottleneck to see which part of your PC should be upgraded next. 

We use multiple benchmarks on a weekly basis to evaluate the performance of the latest PC that we’re reviewing. You can check out our benchmark scores in all of our laptop, desktop PC and component reviews.

But if you’d like to benchmark your own PC, and see how it compares to alternative options, then check out our step-by-step guide below. 

What you’ll need

  • A PC
  • PCMark 10 (free)
  • Geekbench 6 (free)
  • 3DMark (free)
  • CrystalDiskMark (free)

The short version

  1. Test general performance with PCMark 10
  2. Test CPU performance with Geekbench 6
  3. Test GPU performance with 3DMark Time Spy
  4. Test SSD performance with CrystalDiskMark
  1. Step
    1

    Test general performance with PCMark 10

    The first test we recommend is PCMark 10. This benchmark evaluates your PC’s overall performance for a wide range of workloads, including day-to-day tasks, productivity applications, and more demanding work with digital media. 

    PCMark 10 isn’t an ideal benchmark for isolating a performance bottleneck, but it is useful for getting a quick general overview of your PC’s performance. You can download the PCMark 10 demo for free on Steam, which offers unlimited runs with the main PCMark 10 test.

    PCMark 10 will give you a numerical score at the end of the benchmark, which is rather useless in isolation. However, you can compare the number with other scores online, including all of our reviews of the latest laptops and desktop PCs. PCMark 10

  2. Step
    2

    Test CPU performance with Geekbench 6

    If you want to measure CPU performance specifically, then we recommend Geekbench 6. This determines both the CPU’s single-core and multi-core performance. The former is important for overall performance and gaming, while multi-core performance is more important for multitasking and more creative workloads such as video editing and 3D animation.

    Geekbench 6 is cross platform, and so works on both Windows and Mac. You can download it for free here. Again, it will provide a numerical score, which you can compare to our own results in each of our computing reviews. 

    Geekbench 6 is designed to simulate generic workloads such as basic word processing and browsing the web. If you want to test your CPU on a more intensive workload, then we suggest trying out Cinebench instead, which is also free to download and use. Geekbench 6

  3. Step
    3

    Test GPU performance with 3DMark Time Spy

    If you’re keen to find out how your PC can handle graphics-intensive workloads, such as gaming and content creation, then we recommend using 3DMark Time Spy. This evaluates the performance of your GPU specifically. 

    3DMark Time Spy is free to run using the free demo of 3DMark over on Steam. Simply download the software and run the benchmark to get a numeric score, which you’ll be able to compare to the results in our reviews. If you don’t own a dedicated GPU/graphics card, then it’s likely you’ll get a relatively low score here, but that shouldn’t be an issue unless you do like to game on PC, or consider yourself a professional digital creator. 

    Blender is a good alternative GPU benchmark if you want to evaluate performance specifically for content creation rather than gaming. 
    3DMark

  4. Step
    4

    Test SSD performance with CrystalDiskMark

    The SSD performance is often overlooked compared to other components, and yet its performance is incredibly important for several workloads, from booting up the PC to loading up applications and speeding through loading screens in a video game.

    CrystalDiskMark is our go-to SSD benchmark, as it measures both sequential and random performance. If you just want a generic look at the SSD performance, then it’s fine just to take the top two scores. The read performance determines how fast your PC is at loading up data (such as an app or game), while the write performance determines the speed of saving data onto your PC (such as installing software). 
    CrystalDiskMark

Troubleshooting

How can I benchmark my PC for free?

All of the benchmark software listed above are available for free. Many do have paid-for tiers that unlock extra benchmarks, but most people won’t need that level of depth.

What is a good PC benchmark score?

This is subjective and differs between benchmarks. For example, PCMark 10 suggests at least a score of 4100 for basic tasks. Check each benchmark’s website for their recommendations, but also compare with other systems using data found online, including our computing reviews.

The post How to benchmark your PC appeared first on Trusted Reviews.

How to use different backgrounds on Zoom

Zoom logo
Image Credit (Zoom)

Whether you’re working from home and need to hide that pile of laundry before an important call or you’re at the office and want to minimise any background distractions, Zoom has you covered. 

Zoom allows you to change or blur your background in meetings to protect your privacy. Changing your background is incredibly easy and takes a matter of seconds. To learn how, read on to follow our step by step guide.

What you’ll need

  • Zoom account

The short version

  1. Sign into your Zoom account
  2. Click your profile picture
  3. Select Settings in the drop down menu
  4. Choose Background & Effects
  5. Choose Virtual Backgrounds
  6. Select your background
  1. Step
    1

    Sign into your Zoom account

    We’ll be demonstrating the steps through the Zoom Desktop Client app for Mac but the steps are similar on a PC. Scroll down to our Troubleshooting section below to see the steps for changing your background on an Android or iOS device or through the Zoom Web Client.Zoom app sign in page

  2. Step
    2

    Click your profile picture

    You’ll find this in the top-right corner of the Zoom app. Clicking your profile picture will open a dropdown menu which lists a few options.Zoom app home page with profile picture highlighted

  3. Step
    3

    Select Settings in the dropdown menu

    You’ll find Settings towards the end of the list of options. Selecting Settings will launch a pop-up menu with numerous options.Zoom Dropdown Menu with Settings highlighted

  4. Step
    4

    Choose Background & Effects

    Just over halfway through the list of options on the side panel you’ll find Background & Effects.Zoom Settings Side Panel with Background & Effects option highlighted

  5. Step
    5

    Choose Virtual Backgrounds

    This should open up automatically once you’ve selected Background & Effects, but if not then just click on Virtual Backgrounds.
    Zoom app Background & Effects page with Virtual Backgrounds option open

  6. Step
    6

    Select your background

    You can choose one of the preset backgrounds found on Zoom, or you can add your own by clicking the plus (+) option highlighted here. You’ll see a preview of your background here too, so you’ll be able to pick and choose which one you’d like.Zoom Background & Effects page with plus icon highlighted

Troubleshooting

How do I change the Zoom background on a mobile app or through the Web Client?

The steps to change your Zoom background on either your Android or iOS app or Web Client are slightly different to a computer app, but rest assured it’s still straightforward. 

Firstly you’ll need to either join an existing Zoom meeting or start a new one yourself. Once you’re in, tap More in the controls and then select Background and Effects. From here you can choose which background you’d like to apply or tap the plus (+) icon to upload a new image. Note that the background will be applied automatically.

How do I turn off my virtual background?

To turn off your virtual background, open the Background & Effects option and choose Virtual Backgrounds. From here, simply click None and this will turn off your background.

The post How to use different backgrounds on Zoom appeared first on Trusted Reviews.

How to find the right laptop charger

Microsoft Surface Laptop 5 (1)
Microsoft Surface Laptop 5 - Image Credit (Trusted Reviews)

You’d think that purchasing a new laptop charger should be a relatively simple process, but that’s sadly not the case, as a fair amount of research is required. 

Purchase the wrong charger, and it may not deliver enough power to charge up the laptop at a sufficient speed. It’s also possible that your charger won’t even fit into your chosen laptop, making it a pointless purchase.

To help ensure you avoid these potential problems, we’ve created this guide to help you find the right laptop charger. We may even help you save some money, as sometimes a universal charger can be cheaper than the default option bundled with your PC. 

So if you’re looking to buy a new laptop charger, make sure to keep on reading so you maximise value for money. 

Check the connection 

The very first thing you need to consider when buying a laptop charger is whether it uses the right connection – otherwise, your charger won’t even be able to plug into the laptop. 

USB-C is gradually becoming the default charging connector for laptops, and looks like an oval. It’s the same connector used on modern smartphones, which makes it handy for using one universal charger for multiple devices.

What is USB C?
USB-C

Not every laptop uses USB-C though, as many still use the pin design, which can vary in design and size depending on the manufacturer. This connection will likely look like a symmetrical circle, and is often used by power-hungry portables such as gaming laptops. 

If your laptop uses a pin, then it’s probably best to be on the safe side and purchase the charger directly from the manufacturer. In order to find out the specific laptop model you own, you can find your laptop’s serial number on the underside of the chassis.

If you’re keen to get a third-party charger, as it most likely will be cheaper, then make sure to visit your laptop manufacturer’s website to check the exact specification of the pin. 

MacBook Air M3 magsafe port
Magsafe – Image Credit (Trusted Reviews)

And then there are also a number of proprietary chargers from select manufacturers. For example, Apple now uses MagSafe chargers for its latest MacBook laptops, while Microsoft continues to use Surface Connect. 

Determine the wattage of your laptop 

The second step is to make sure that your charger is powerful enough to meet the wattage requirements of your laptop. If the charger wattage is too low, it may still power the laptop, but at a slower rate – maybe to such an extent that you won’t be able to use the laptop as it charges. 

This means that smartphone chargers are usually not powerful enough for your laptop, which is a shame when they’re both using the same USB-C connection. 

The wattage of a laptop should be printed in small text on the charger that was bundled in the box. For example, when inspecting the text on our Samsung laptop, we can see that it says 140W. 

Samsung Galaxy Book 3 Ultra laptop on wooden table.
Image Credit (Trusted Reviews)

If you’ve lost or misplaced your laptop charger and are seeking a replacement, then you’ll need to visit the manufacturer’s website instead. In our case, Samsung listed the wattage on the official specs of the laptop, but this won’t always be the case. You may need to find a manal or visit customer services instead. 

If you can’t find the exact wattage, then it’s better to go higher than lower. A higher wattage won’t cause any damage to your laptop, although the charging speed won’t get an extra boost than what the default charger provides. That said, a higher wattage will likely be reflected in the price, so don’t expect it to be cheap. 

Conclusion 

When purchasing a laptop charger, you have two main options: pick the official charger from the same manufacturer as your laptop, or opt for a third-party option. 

The official charger will likely cost a lot of money, but you’ll be safe knowing that it will work without issue. Purchasing a third-party charger can often be cheaper, but you’ll need to do your own research on the connection and wattage to make sure it works correctly with your laptop. There’s less risk going for a USB-C laptop charger than one with a pin design. 

The post How to find the right laptop charger appeared first on Trusted Reviews.

How to mute someone on Instagram

The instagram logo on a pink background

Everyone likely has that friend or family member on Instagram who makes annoying daily posts. Blocking someone can feel like too much of a drastic step, making the mute function a far more preferable option. 

Muting someone won’t stop you following an account, therefore avoiding any awkward confrontations, but instead simply hides their posts from your timeline. You even get the options to mute posts, stories and/or notes. 

Reversing the process is very easy too, so it’s possible to mute someone just for a few weeks if you do want to see their posts again in the future. 

The process of muting accounts on Instagram is very simple to do, and we’ve detailed a step-by-step guide below to help you out. This guide is for use with a smartphone, but you can check out our Troubleshooting section further below for our guide while using a PC. 

What you’ll need

  • An Instagram account
  • A smartphone or PC 

The short version

  1. Head over to the Instagram account you want to mute 
  2. Click on Following 
  3. Select Mute
  4. Choose to Mute posts, stories and/or Notes 
  1. Step
    1

    Head over to the Instagram account you want to mute 

    We located the Instagram account by clicking on the magnifying glass icon on the bottom taskbar, and then using the search bar. However, you can also navigate to an account by simply pressing on its profile picture if you spot it on your timeline. 
    How to mute someone on Instagram

  2. Step
    2

    Click on Following 

    The Following button can be found underneath the main profile picture on the account. It sits to the left side of the Message button. 
    How to mute someone on Instagram

  3. Step
    3

    Select Mute

    A new pop-up window should appear with the Mute option located on the third highest row. Click on it.

    How to mute someone on Instagram

  4. Step
    4

    Choose to Mute Posts, Stories and/or Notes 

    You’ll now get the option to mute Posts, Stories and Notes. You can either select all of these options, or toggle them individually. This may be useful if you don’t like their posts popping up on the timeline, but don’t mind having the option to view their stories.

    And if you ever want to unmute the account, you simply need to click on the toggle again by repeating the same steps. 

    How to mute someone on Instagram

Troubleshooting

How do I mute someone on Instagram using a PC?

Muting someone on Instagram via PC is largely the same as on a smartphone. Simply visit the account you want to mute, select Following at the top, select Mute and then click on Posts and/or Stories.

Will people know that you have muted their account?

There is no official way for someone to find out that you have muted them on Instagram. However, they may be able to work out that you have muted their Stories if you never show up as a viewer despite being active.

The post How to mute someone on Instagram appeared first on Trusted Reviews.

How to completely delete your Reddit account

reddit

If you’re looking to limit the amount of time you spend online, you may want to consider deleting your Reddit account.

In this guide, we’ll walk you through all the steps required to completely delete your Reddit account for good. It’s a simple process and we’ve laid out all the steps below. To delve deeper into the subject, see the troubleshooting guide below.

Before you start, It’s important to note that if you do delete your Reddit account, you will have no way of recovering it. This process is very final. If you’re happy to proceed, keep on reading.

What you’ll need: 

  • A Reddit account
  • An email you can access

The Short Version 

  • Open Reddit
  • Click on your profile picture
  • Click on User Settings
  • Scroll down and click Delete Account
  • Enter your username and password
  • Tick the box
  • Press Delete
  • Click Delete
Final Fantasy 16 now 57% off

Final Fantasy 16 now 57% off

Final Fantasy 16, the latest installment of the iconic action RPG franchise, is now available for just £29.99 on PS5

  • Amazon
  • Was £69.99
  • Now £29.99
View Deal
  1. Step
    1

    Open Reddit

    Open up Reddit on your browser. Log into Reddit

  2. Step
    2

    Click on your profile picture

    Go to the top-right corner of the screen and click on your profile picture. Go to your Profile

  3. Step
    3

    Click on User Settings

    From the drop-down menu presented, click on the heading called User Settings. Click on User Settings

  4. Step
    4

    Scroll down and click Delete Account

    Scroll down to the bottom of the page and click on the red button called Delete Account. Go to Delete my Account

  5. Step
    5

    Enter your username and password

    Enter both your username and password to continue. Enter your info

  6. Step
    6

    Tick the box

    Make sure you tick the box confirming that deleted Reddit accounts cannot be recovered. Press Delete

  7. Step
    7

    Press Delete

    Click the Delete button. Press Delete

  8. Step
    8

    Click Delete

    To confirm that you want to delete your Reddit account, click on the Delete button again to finish the process. Press Delete again

Troubleshooting

Can I recover a deleted Reddit account?

No, there is no way to recover your Reddit account once it has been deleted. If you are concerned that recovery will not be an option, you may want to hold off on deleting your account for now.

Can I delete Reddit from my mobile app?

No, you can only delete your Reddit account from a browser. You can delete it from a laptop, tablet or handset, but it can only be done in the browser.

The post How to completely delete your Reddit account appeared first on Trusted Reviews.

How to check CPU core usage on Windows 11

Checking your PC’s usage of each CPU core is a good way to determine how your system is dealing with the current workload. 

This can help inform you whether you have a powerful enough processor to deal with the task or hand. Most simple tasks will only require the performance of a single CPU core, but more complex workloads, such as video editing or gaming, will require more resources. 

It’s difficult to determine which components of your PC are causing a performance bottleneck, but checking the CPU core usage can go a long way to finding the answer. 

In this guide we’ll be detailing how to find the usage of each of your CPU cores when running any tasks on your Windows PC. 

What you’ll need

  • A Windows PC

The short version 

  1. Open Task Manager
  2. Click on the performance tab
  3. Right-click on the graph
  4. Hover over ‘Change graph to’ and select Logical processors 
  5. Check out the detailed breakdown of your CPU
  1. Step
    1

    Open Task Manager

    We did this by searching Task Manager in the Windows search bar, but you can also use the keyboard shortcut Ctrl + Shift + Esc.

    How to check CPU core usage on Windows 11

  2. Step
    2

    Click on the performance tab

    The processes tab should open by default, listing all of the apps and current processes that your PC is running. To check your CPU core usage, click on the Performance tab in the left-hand column.
    How to check CPU core usage on Windows 11

  3. Step
    3

    Right-click on the graph

    You should now see a graphic detailing the overall utilisation of your CPU, with metrics such as the speed listed underneath. For a breakdown of the usage per core, right-click on the graph.
    How to check CPU core usage on Windows 11

  4. Step
    4

    Hover over ‘Change graph to’ and select Logical processors

    After right-clicking, a pop-up box should appear. Hover over the ‘Change graph to’ option listed at the top, and then click on the option for Logical processors.
    How to check CPU core usage on Windows 11

  5. Step
    5

    Check out the detailed breakdown of your CPU

    Once you’ve completed the prior step, you should notice that the graph has now been broken into multiple windows, with the number depending on how many threads your CPU has. In our laptop’s case, the 22 threads are represented by 22 windows, all providing a snapshot of their current utilisation.
    How to check CPU core usage on Windows 11

Troubleshooting

How to check how many cores your CPU has

If you want to find out how many cores your PC’s CPU has, then go to Task Manager > Performance. You should see the number of cores listed below the graph.

Why aren’t all of the cores being fully utilised?

You may notice that only one core is working hard, while the rest remain dormant. This is nothing to be concerned about, as most basic workloads on a Windows PC do not require the utilisation of multiple cores. You only really need a large number of cores running at full hilt when running complex tasks such as video editing and 3D animation.

The post How to check CPU core usage on Windows 11 appeared first on Trusted Reviews.

Why does one CPU core work harder than others?

Modern CPUs are now capable of featuring a remarkable number of cores, pushing up the performance ceiling to all-new heights.

For example, the Intel Core i9-14900K desktop processor is packed with 24 cores, making it far more powerful than the more basic dual-core quad-core chips.

However, anyone with a PC may have noticed that most computer-based workloads will only utilise a single core. That may prove frustrating for those who have invested so much money into a processor with so many cores, so why does this happen? 

We’ve created this guide to explain why one CPU core will generally work harder than the test, and why this shouldn’t be cause for concern for your PC. 

One core to rule them all

If you check your CPU performance via Windows task manager, you’ll likely see that the vast majority of your processor’s workload has been given to Core 0, rather than splitting them evenly across all of the available cores. 

This is because most workloads don’t require the use of multiple cores. Basic tasks such as browsing the web or using a single application are not very intensive on the processor, and so will usually only require the performance of a single core. 

It would be entirely possible for the likes of Windows to distribute the performance more evenly, but upping the frequency of multiple cores will cause the chip to consume more power, which is wasteful if a single core could comfortably cope with the same workload.

It’s actually fairly rare for an application to make use of all of your cores, especially if you have a 24-core desktop chip. Even intensive workloads such as gaming probably won’t make full use of all of your cores. 

Wasted potential

The vast majority of games only require a small number of CPU cores in order to run on your PC. 

For example, Cyberpunk 2077 is one of the most technically intensive games available, and yet recommends a quad-core Intel chip for the minimum requirements. The recommended specs list a more powerful 12-core processor instead, but it’s still a far cry from the 24-core chips that are now available. 

Cranking up the CPU count is unlikely to cause a significant performance boost either. Sticking with Cyberpunk 2077 at a 1080p resolution, we recorded a 224fps average performance with the 14-core Intel Core i5-14600K chip, while upgrading to the 24-core Intel Core i9-14900K saw an average performance of 221fps. While this looks like a drop in performance, this is likely just a minor fluctuation, instead indicating that the two chips are capable of an almost identical performance for this specific game. 

Cyberpunk

Cyberpunk 2077 isn’t designed to make use of more than eight cores at a time, so additional cores are effectively wasted here. This means that, as long as you have at least eight cores, the single-core performance will generally be the biggest determining factor to determine how influential a CPU will be on your PC’s gaming performance. 

Like with most games, Cyberpunk is more reliant on the GPU when it comes to performance. Upgrading your GPU will likely have a far bigger effect on performance than upgrading to a processor with more cores. There are certain games that are more CPU intensive than usual, such as the Total War and Civilization series, but GPU performance remains the most important factor. 

Multi-core fun

After establishing that most computer workloads don’t actually require a large number of cores, you may be wondering what the point is in investing in a 24-core desktop chip. Well, there are specific workloads that do make use of such processing power. 

Multiple cores are more useful for applications that are likely to run multiple complex processes simultaneously. This includes workloads such as video editing, 3D animation and batch processing. 

Adobe claims that Premiere Pro runs at 93-98% efficiency with eight cores, while a whopping 32-core setup is suggested for demanding workloads in After Effects when taking full advantage of Multi-Frame Rendering.

Adobe Premiere Pro

If you find yourself running these sorts of applications, you’ll likely find your CPU utilising more cores than usual in order to deliver the required performance. Performance is likely to scale up when using more cores with such apps, whereas that isn’t the case with more simple processes.

And while we’ve established that video games don’t necessarily require a lot of cores, it’s a different story if you want to record footage or broadcast live gameplay, as more cores are required to perform all of these different tasks simultaneously.

With all of this in mind, you should really consider how many cores you’ll likely need from a CPU before buying one. If you’re going to be sticking to basic tasks, then it’s likely you’ll be wasting the potential of the majority of cores in a high-end processor. But the extra cores may well come in handy when dealing with more complex workloads or running multiple processes at one time.

The post Why does one CPU core work harder than others? appeared first on Trusted Reviews.

How to reset your graphics driver on Windows

Windows 11
Image Credit (Microsoft)

Resetting your graphics driver is a useful option for a number of scenarios for your Windows PC.

If you’re encountering odd screen flickering, or have noticed that your graphics card is behaving erratically after an update, then resetting your graphics driver can sometimes be an easy fix to get your PC working correctly again.

The quickest way to reset your graphics driver on Windows is to use the keyboard shortcut Ctrl + Windows + Shift + B. After hitting this key combo, you should hear a beeping noise, before your display goes black and then pops back into view. 

We’ve also detailed the manual method below, just in case the keyboard shortcut isn’t working for you. 

What you’ll need

  • A Windows PC

The short version

  1. Open Device Manager 
  2. Expand Display Adaptors 
  3. Right-click on your graphics driver and click on Properties 
  4. Click on the Driver tab
  5. Select Disable Device and then Yes
  6. Select Enable Device 
50GB SIM for just £8

50GB SIM for just £8

Smarty just beefed up its 16GB SIM, instead letting you get 50GB for the first 15-months of your contract at no extra cost. That’s some of the best value for money you’ll find on a data plan right now.

  • Smarty
  • Limited time offer
  • Just £8/month
View Deal
  1. Step
    1

    Open Device Manager

    You can locate this by typing Device Manager into the Windows search bar found in the Taskbar.
    How to reset graphics driver

  2. Step
    2

    Expand Display Adaptors 

    This should be the sixth option down. You can expand Display Adaptors by pressing on the small arrow underneath. How to reset graphics driver

  3. Step
    3

    Right-click on your graphics driver and click on Properties 

    The name of your GPU should now appear to indicate your graphics driver. Right-click this, and then select Properties at the bottom of the pop-up window. How to reset graphics driver

  4. Step
    4

    Click on the Driver tab

    At the top of the pop-up window, you should find a row of tabs. Click on the second one along, which should be labelled as Driver. 
    How to reset graphics driver

  5. Step
    5

    Select Disable Device and then Yes

    Near the bottom of the window, you should find the option for Disable Device. Click on this. You’ll then get a warning pop-up message. Confirm your decision by pressing Yes. Your screen will now go black for a couple of seconds, before reappearing. You may notice that your display now looks a bit odd, but there’s no need to worry. How to reset graphics driver

  6. Step
    6

    Select Enable Device 

    Once your display returns after a momentary pause, then make sure to click on Enable Device. Your screen should then go black again, but will then return to normal. Your graphics driver has now been reset, and hopefully your display issues fixed. How to reset graphics driver

Troubleshooting

The display issues haven’t been fixed

If you’re still experiencing display issues despite resetting your graphics driver, then it’s worth uninstalling your drivers (you can find the option on Step 5) and then visiting the relevant manufacturer website to install the latest drivers for your specific GPU. Updating your PC is also worth a try.

What is the keyboard shortcut to reset your graphics driver?

Using the keyboard shortcut Ctrl + Windows + Shift + B will reset your graphics driver in an instant.

The post How to reset your graphics driver on Windows appeared first on Trusted Reviews.

How to enable Windows Copilot

Copilot key
Image Credit (Microsoft)

Windows Copilot is Microsoft’s answer to ChatGPT, with the AI-powered chatbot now available on Windows 10 and Windows 11 devices. 

Copilot can not only answer questions in a similar fashion to ChatGPT, but it’s also able to adjust some of your PC’s settings such as adjusting the volume. 

While ChatGPT can be accessed via a web browser, ChatGPT is instead baked into Windows, allowing for a little bit more control over your PC. This version of Copilot is free to use too, although this isn’t to be confused with Copilot for Microsoft 365, which offers integration with some of Microsoft’s most popular apps. 

But if you can’t find Copilot on your PC, despite using Windows 10 or 11, then you may be wondering how you can enable Windows Copilot. We’ve created this guide to answer that very question, so keep on reading for the step-by-step instructions. 

What you’ll need

  • A Windows 10 or Windows 11 device

The short version 

  1. Update to the latest iteration of Windows 
  2. Go to Settings
  3. Click on Personalisation 
  4. Click on Taskbar
  5. Activate Copilot (preview)
  6. Find Copilot in the far right side of the Taskbar
  1. Step
    1

    Update to the latest iteration of Windows

    There’s no need to download Copilot, as it should come installed on your Windows by default once you’ve installed the latest update. You check whether your PC’s up to date by going to Settings > Windows Update > Check for updates. If any available updates become available, make sure to download them and then restart your PC.How to enable Windows Copilot

  2. Step
    2

    Go to Settings

    Copilot should now be installed on your PC. You should be able to see it in the bottom-right corner of your homescreen, embedded into the taskbar. However, if you still can’t see it, it may be the case that it’s been deactivated. 

    Fortunately, it’s very easy to activate. To start this process, jump into your device’s settings by searching for it with the Search bar at the bottom of your screen. 
    How to enable Windows Copilot

  3. Step
    3

    Click on Personalisation 

    You can find this in the menu on the left-hand side. It’s on the fifth row from the top, and has the icon of a paintbrush.How to enable Windows Copilot

  4. Step
    4

    Click on Taskbar

    In the newly opened Personalisation menu, you should find the option for Taskbar eight rows down. Click on this. How to enable Windows Copilot

  5. Step
    5

    Activate Copilot (preview)

    If you’ve updated to the latest iteration of Windows, you should find the option for Copilot (Preview) near the top of the Taskbar menu. Make sure the toggle next to it is set to ‘On’. 
    How to enable Windows Copilot

  6. Step
    6

    Find Copilot in the far right side of the Taskbar

    You should now be able to find the option for Windows Copilot in the far-right side of your Taskbar. Simply click on this icon, and then ask it questions by typing into the box. You can also open Copilot by using the keyboard shortcut Windows Key + C. And if you’re lucky enough to own a modern Windows 11 PC, you may even have the dedicated Copilot key. 
    How to enable Windows Copilot

Troubleshooting

Why can’t I see Copilot on Windows?

If you can’t see Copilot on the far right side of your taskbar, it likely means that your PC needs to be updated. If that still hasn’t fixed the issue, follow the above steps to make sure it will show on the Taskbar.

Is Microsoft Copilot free to use?

Yes, the standard Copilot should be free to use for Windows 10 and Windows 11 users. However, if you want the more advanced Copilot for Microsoft 365, which offers integration with Microsoft apps such as Word and Excel, then you’ll need to pay a monthly fee. This is currently priced at £24.70 per month for each user.

The post How to enable Windows Copilot appeared first on Trusted Reviews.

How to set up a Steam Family account

Steam Logo

Stam has made it easier to keep tabs of your children while gaming thanks to the new Steam Families feature. 

Steam Families allows you to invite up to five family members, all of which will be able to gain access to the shareable games that your family owns. Each member will still have a separate account, despite sharing the game library, allowing them to make their own save progress and Steam achievements.

There are numerous parental controls here too, allowing you to set which games are available to your children, restrict access to the chat functionality, view playtime reports and approve/deny requests for additional playtime or game purchases. 

The one issue is that the Steam Families feature is currently in beta, so you need to jump through a few hoops to get it activated. It’s still an easy process though, which you can see detailed below.

What you’ll need

  • A Steam account 

The Short Version 

  1. Click on Steam in top-left corner
  2. Open Settings menu
  3. Select Interface
  4. Locate dropdown menu by Client Beta Participation
  5. Select Steam Family Beta from the dropdown list
  6. Press on Restart Now
  7. Back on Steam homepage, select your profile name
  8. Select Account Details 
  9. Click on Family Management 
  10. Hit Create a Family
  11. Enter a name for your family 
  12. Press on Invite a Member 
  13. Locate your family members
  14. Invite as an adult of child 
  15. Confirm the invite 
  1. Step
    1

    Click on Steam in top-left corner

    The first step is to join the beta for Steam Families. Firstly, open Steam and then select the Steam logo in the top-left corner.
    How to set up a Steam Family account

  2. Step
    2

    Open Settings menu

    A dropdown menu should appear. Select the Settings option, which is the second-to-last option. 
    How to set up a Steam Family account

  3. Step
    3

    Select Interface

    In the left-sided menu, you should see the option for Interface six entries down. 

    How to set up a Steam Family account

  4. Step
    4

    Locate Client Beta Participation and select Steam Family Beta from dropdown list

    Now look to the right side, and you should find the option for Client Beta Participation three rows down. Click on the dropdown list to its right side, and then click the option for Steam Family Beta.
    How to set up a Steam Family account

  5. Step
    5

    Press on Restart Now

    Your Steam account will need to be restarted once you’ve signed up for the beta. A pop-up window should prompt you to do so. 
    How to set up a Steam Family account

  6. Step
    6

    Back on Steam homepage, select your profile name

    Now it’s time to create your Steam family. Return to the Steam homepage, and then click on your profile name in the top-right corner. 
    How to set up a Steam Family account

  7. Step
    7

    Select Account Details 

    The second option down should be Account Details. Click on this. How to set up a Steam Family account

  8. Step
    8

    Click on Family Management 

    Over on the left-sided menu, find the option for Family Management three rows down.
    How to set up a Steam Family account

  9. Step
    9

    Select Create a Family

    You should now see the option to either Join a Family, or Create a Family. For this guide, you’ll want to hit the latter option. How to set up a Steam Family account

  10. Step
    10

    Enter a name for your family 

    You will now need to enter a family name, which is easily recognisable and easy to search for. Press on Create once you have decided on your family name. 
    How to set up a Steam Family account

  11. Step
    11

    Press on Invite a Member 

    Now you’ve created your Steam Family, it’s time to invite your family members to join. Click on Invite a Member to begin the process. You can add more family members at a later date if you want to. 
    How to set up a Steam Family account

  12. Step
    12

    Locate your family members

    Your Steam friends should automatically pop up as options. Select whoever you want to join your Steam family. 
    How to set up a Steam Family account

  13. Step
    13

    Invite as an adult of child 

    You will be given the option to add your family member as a child or an adult. All of the adult members can manage invites and apply account restrictions, while child members will be subject to parental controls and cannot alter any of the settings. 
    How to set up a Steam Family account

  14. Step
    14

    Confirm the invite 

    A pop-up window will then appear to confirm your invitation. Once this is sent over, the account holder should receive an alert notifying them of the invitation. They must accept before being added to the Family. Repeat this process to add in the remainder of your family members, and then you’ve finished setting up your Steam Family. How to set up a Steam Family account

Troubleshooting

Can a Steam Family play together?

If your Steam Family only owns one copy of a game, then only one person will be able to play it at a time. If you want two accounts to play on one game together, then each player will need to purchase the game separately.

How many people can be in a Steam Family

Steam allows for up to 6 family members per Steam Family.

The post How to set up a Steam Family account appeared first on Trusted Reviews.

5 signs that indicate it's time to upgrade your graphics card

PC gaming is the way to go if you want the highest performance ceiling possible for the latest games. However, it’s important to keep all of your various components up to date if you want to make sure you’re still getting an optimal gaming experience. 

The graphics card is arguably the most important component of a PC when it comes to gaming, as it has the greatest influence on gaming performance. Build a high-end PC, but settle for a budget GPU, and you may struggle to play numerous modern games.

However, it may be difficult to know when the time is right to upgrade your graphics card. If you’re not too knowledgeable about PC specs, you may be wondering whether it’s your graphics card that’s causing the performance bottleneck, or maybe something else instead. 

We’ve created this guide to help you determine whether your PC is in need of a graphics card upgrade, or whether your money is better spent elsewhere. Keep scrolling for the five biggest signs that indicate that it’s time to upgrade your graphics card. 

Frame rate
Credit: Nvidia

Low frame rate

The easiest way to determine the gaming performance of your graphics card is to check the average frame rate when playing your favourite PC games. If you’re not familiar with frame rates, this refers to how many images your PC can generate per second while running a game. 

A higher frame rate will result in a smoother performance, allowing you to see every tiny detail of a character’s movement within a game. This is especially useful for shooters, as it makes it easier to target a moving object. 

An average 30fps performance is widely agreed to be the minimum required to play a game without major issues. Drop lower than this figure, and then you’ll likely see a lot of janky animations and an overall poor experience.

It’s very easy to see the frame rate of any game on your PC. If you’re using Steam, simply go to Settings > In-Game > In-Game FPS Counter, as this will display a counter in your chosen corner of your monitor. If you’re not using Steam, then Nvidia and AMD also offer their own solutions through their own software. 

With a frame rate counter activated, you’ll be able to boot up a game and determine your PC’s performance. If you’re noticing the counter drop below 30fps frequently for your chosen resolution and graphics settings, then it may be worth purchasing a new graphics card. 

Bear in mind that some games are more taxing than others. Visually stunning 3D games will be more difficult to run than 2D platformers for example. Multiplayer shooters such as Overwatch 2, Fortnite and Counter-Strike 2 will be far less taxing on the graphics card, as fluid gameplay is prioritised over photo-realistic visuals. Many gamers will want a performance well over 100fps for competitive games like these though, so adjust your expectations if these are the type of games you enjoy.

Left ImageRight Image

Poor ray tracing performance

One of the big buzzwords in gaming right now, even in the console space, is ray tracing. This refers to an advanced light-rendering technology, which creates more realistic lighting, shadows and reflections. 

The biggest issue with ray tracing is that it’s very taxing on the graphics card, and isn’t supported by older cards. Nvidia first introduced ray tracing with its RTX 2000 graphics cards, and has made the technology more efficient with every generation, all the way up to the most recent RTX 4000 range. Meanwhile, AMD first supported ray tracing with its Radeon 6000 graphics cards back in 2020. If you’d like to make use of ray tracing, but own an older GPU, then you need to upgrade your graphics card. 

It’s also possible that you own a graphics card which supports ray tracing but simply isn’t powerful enough to activate the technology while also maintaining a reasonable frame rate. For example, Cyberpunk 2077 requires at least an Nvidia RTX 3080 GPU if you want to have ray tracing activated with RT Ultra settings. 

To check whether your PC can handle your chosen game with ray tracing activated, simply activate the technology in the settings, and then see what figure your frame rate counter drops to. Take note, that not every game supports ray tracing, although support is increasing by the year. 

Task Manager running while Total War: Warhammer 2 benchmark runs in the background
Image Credit (Trusted Reviews)

High GPU usage

Checking the frame rate is a good indicator of your PC’s performance overall, but it doesn’t narrow down whether it’s your GPU or CPU causing the issues. Either one could be the performance bottleneck, so it’s important to determine the guilty party. 

The best way to do this is to monitor your GPU and CPU usage while running a game. You can do this via Windows’ own Task manager (open by pressing Ctrl+Shift+Esc) or by downloading third-party software such as MSI Afterburner. 

Here you should see the usage of both your CPU and GPU rated out of 100%. Seeing your GPU usage hit over 90%, or even as high as 100%, isn’t necessarily an issue in isolation. This merely means that your GPU’s performance is being maximised, which is a good thing.

However, if you’re seeing poor gaming performance, and your GPU usage remains high (close to the 100% mark as shown above), and your CPU usage is low, then this indicates a GPU performance bottleneck. This means that the best way to solve the issue is likely by purchasing a new graphics card. 

However, if it’s instead your CPU usage that is high, and your GPU usage is low, then this indicates a CPU bottleneck, which means your processor isn’t powerful enough to deal with the current workloads, and so your GPU’s performance is being underutilised. In this scenario, you’re better off upgrading your CPU instead of your graphics card. 

Cyberpunk system requirements
Credit: Nvidia

Fail to meet game’s system requirements 

One of the easiest ways to check whether your graphics card is up to snuff is to check out your favourite game’s system requirements. Steam details the minimum requirements for every single game it hosts, and sometimes also lists the recommended specs for an optimal performance. 

If your graphics card is more powerful than the GPU listed, then it’s safe to assume it’s powerful enough to run that game. That said, these system requirements generally only list the requirements for a 1080p performance. Running a game at a 4K resolution will require an even more powerful PC, and it’s more difficult to find the requirements for such use cases.

If you find that your PC is frequently failing to meet the minimum requirements for the latest games, then it’s probably time to upgrade your graphics card. 

A picture of the Nvidia GeForce RTX 4070 Ti running in our test rig
Image Credit (Trusted Reviews)

Overheating

If your graphics card is being overwhelmed with a high workload, then it will generate a lot of heat. It’s normal to expect a graphics card to run hot, but you should be concerned if a graphics card is exceeding the maximum GPU temperature advised by the manufacturer. 

For example, the Nvidia RTX 4090 is designed to operate in heats up to 90°C, so anything below this figure is absolutely fine. But if the temperature creeps over this mark, then it either means your graphics card is being overworked, or that there isn’t enough airflow in your PC case. 

You can check your GPU’s temperature by opening Task Manager (Ctrl+Shift+Esc), opening up the Performance tab and then clicking on the GPU tile. Every graphics card has its own temperature threshold too, which you can find by visiting the manufacturer’s website and digging into the specs. 

If you do find that your graphics card is exceeding its maximum temperature, that doesn’t necessarily mean your GPU isn’t powerful enough for the current workload. Make sure that your PC has enough airflow by checking if any of the vents are blocked by dust and that all of the fans are spinning as expected. Testing the temperature again with your PC case’s side panel removed is a good experiment. If your graphics card is still seeing an abnormally high temperature, it likely means that it’s not powerful enough to handle the current workload. 

Which graphics card should you buy?

If you’ve come to the conclusion that your PC does indeed need a graphics card upgrade, then make sure to visit our Best Graphics Card guide to find the best option for you.

Our individual reviews also provide plenty of useful information, such as benchmark comparisons with other graphics cards, performance results for a selection of games, and our measured power consumption so you know which PSU you need to buy.

Unfortunately, laptop users won’t be able to upgrade to a new GPU in most cases, so you’ll need to purchase a new model if your graphics chip is becoming out of date. Check out our Best Gaming Laptop guide for our top picks.

The post 5 signs that indicate it's time to upgrade your graphics card appeared first on Trusted Reviews.

❌
❌