How To Setup Rankify Blogger Template [Templateify]

Rankify Blogger Template is a modern, futuristic, and responsive template that makes creating a website or blog easy with just a few clicks. With its clean design and intuitive interface. Rankify is perfect for bloggers who want to make their content look professional and attractive.
You have made a good decision by choosing our template. You can check the live demo or download the template through the button below and also Please Read this documentation carefully in order to set up your blog and please note that there’s no support for free users.
You have made a good decision by choosing our template. You can check the live demo or download the template through the button below and also Please Read this documentation carefully in order to set up your blog and please note that there’s no support for free users.
Basic Setup
Video Documentation
You can check this below video to understand the setup process much more easily, just click the below image to watch the video directly on YouTube, or click this link - How To Setup Rankify Blogger Template - Templateify

TopBar Menu
Access your blog Layout > and click on the Edit Icon > in the TopBar Menu gadget.
Widget Settings:
NOTE: If this widget is enabled, the links will also appear on the Mobile Menu.
TopBar Social Icons
Access your blog Layout > and click on the Edit Icon > in the TopBar Icons gadget.
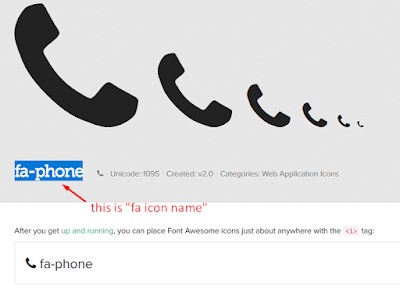
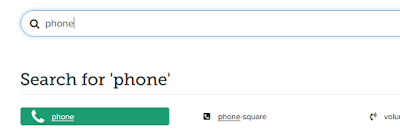
Icon Shortcode: {icon: "ICON-NAME", url: "LINK-URL"}
Supported Icons: blogger, facebook, facebook-f, twitter, rss, youtube, skype, stumbleupon, tumblr, vk, stack-overflow, github, linkedin, dribbble, soundcloud, behance, digg, instagram, pinterest, pinterest-p, twitch, delicious, codepen, flipboard, reddit, whatsapp, telegram, messenger, snapchat, email, discord, share, external-link
Widget Settings:

NOTE: If this widget is enabled, the icons will also appear on the Mobile Menu.
Header ADS
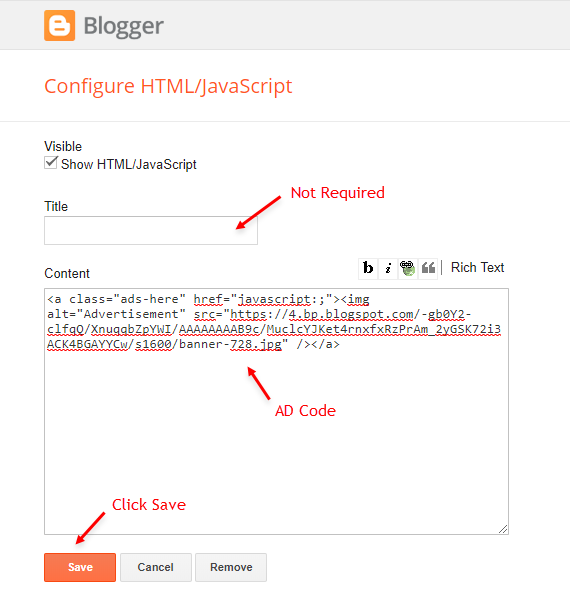
Access your blog Layout > and click on the Add a Gadget > HTML/JavaScript, Image or AdSense > in the section Header ADS.
HTML/JavaScript Ex:
Main Menu
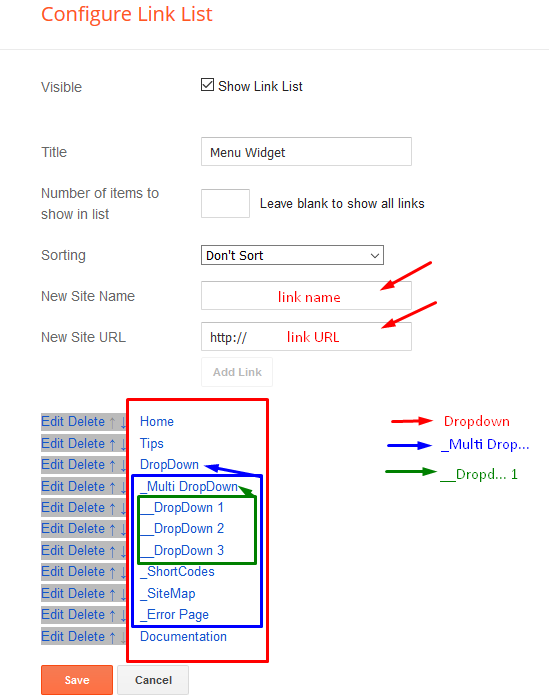
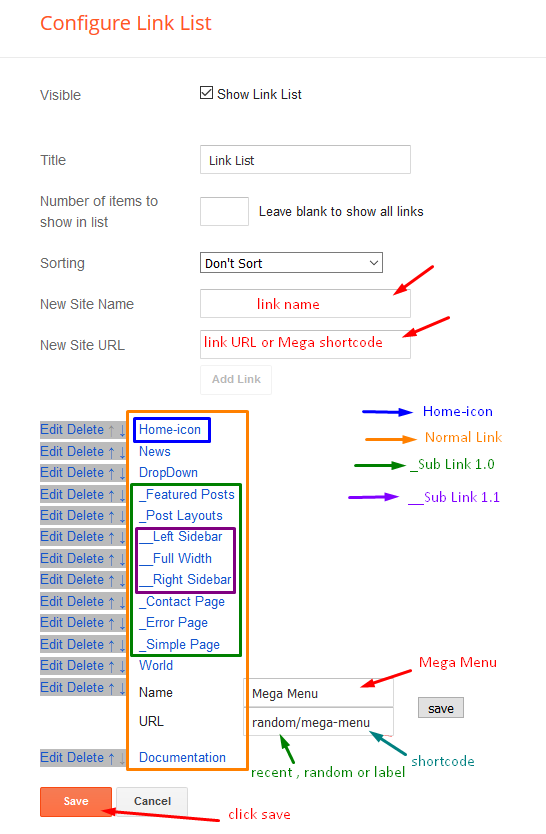
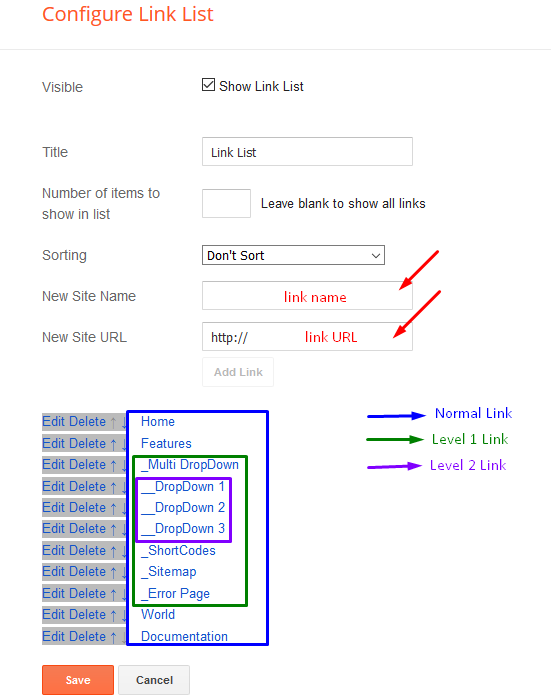
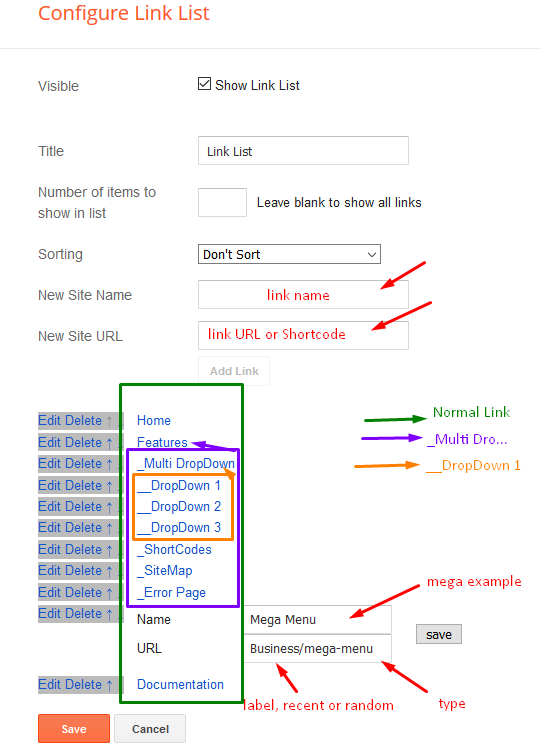
Access your blog Layout > and click on the Edit Icon > in the Main Menu gadget.
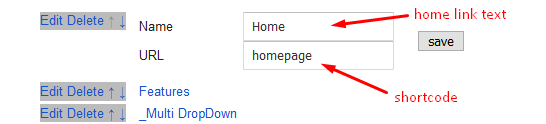
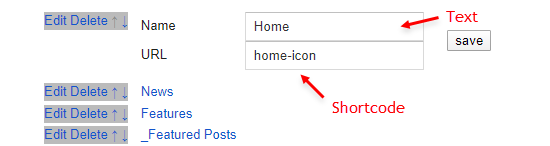
Home Link:
Text Type: home-text
Icon Type: home-icon
Widget Settings 01:
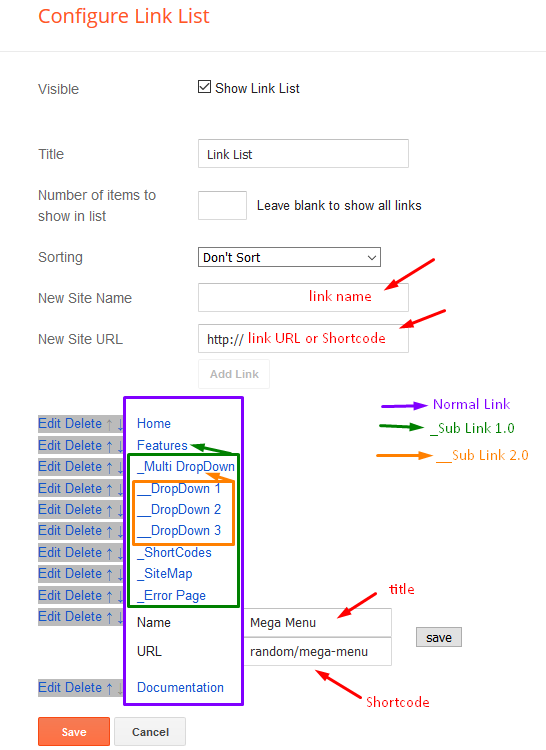
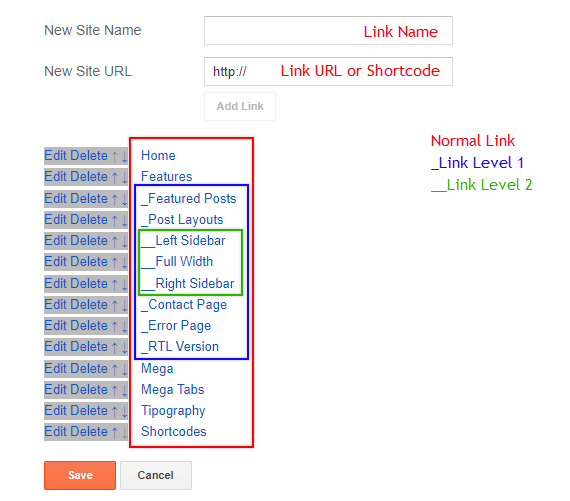
Normal Link and DropDown Options:
Normal Link Ex: Features
SubLink Level 1 Ex: _Level 1 "Before the Title add 1 underscore"
SubLink Level 2 Ex: __Level 2 "Before the Title add 2 underscore"
ALERT: Level 2 Links must be between or below level 1 links.
MegaMenu Options:
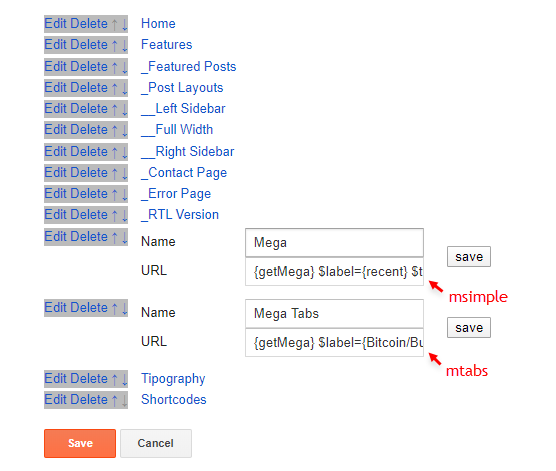
Shortcode Structure: {getMega} $label={Your Label} $type={Type}
Shortcode Types: msimple or mtabs
Shortcode Label: label or recent
What are Label?
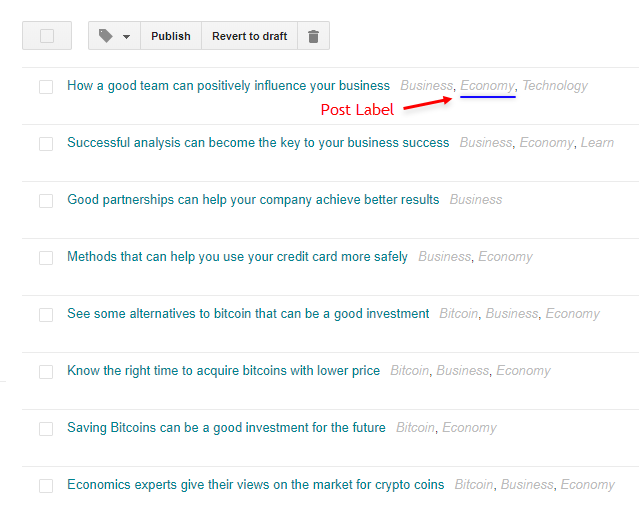
Shortcode mSimple Ex: {getMega} $label={Economy} $type={msimple}
Shortcode mTabs Ex: {getMega} $label={Bitcoin/Business/Sports/Technology/Travel} $type={mtabs}
INFO: In the mTabs type, you can add as many labels as you want, there is no defined limit! but remember they must be separated by "/".
Widget Settings 02:
Widget Settings 03:
SAVING: After adding all the desired links and organizing them in the correct position, click on the Save Button.
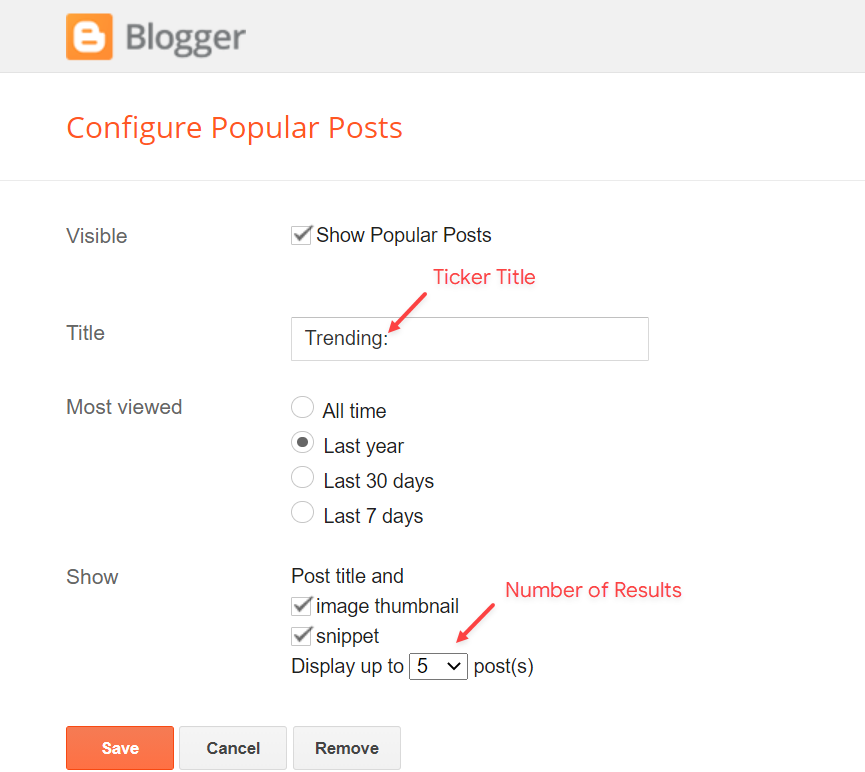
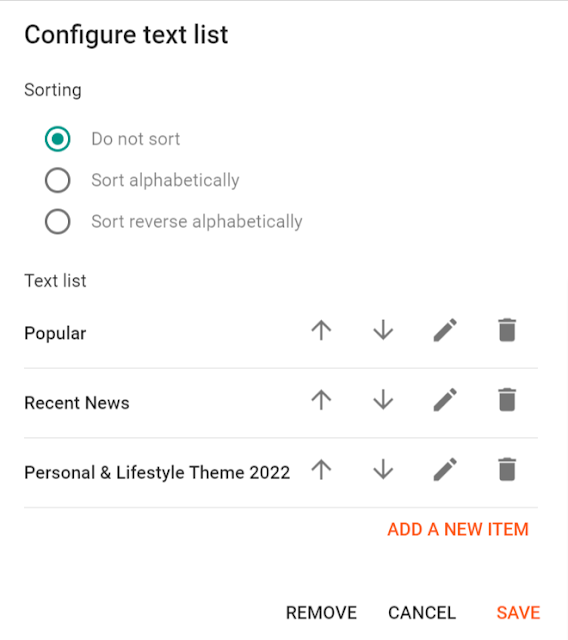
Newsticker
Access your blog Layout > click Add a Gadget > Popular Posts on Newsticker section, you set the settings as below
Access your blog Layout > click Add a Gadget > Popular Posts on Newsticker section, you set the settings as below
Widget Settings:

Widget Settings:
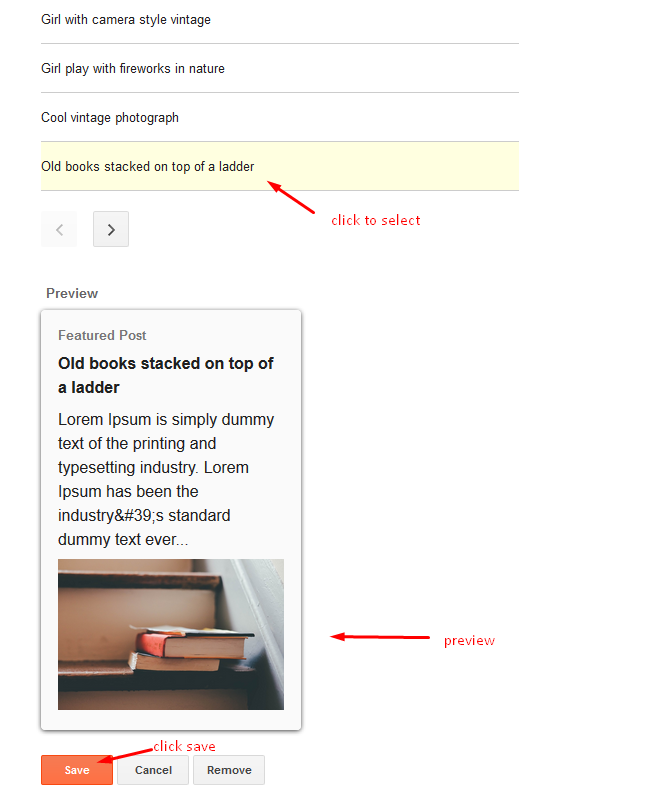
Featured Posts
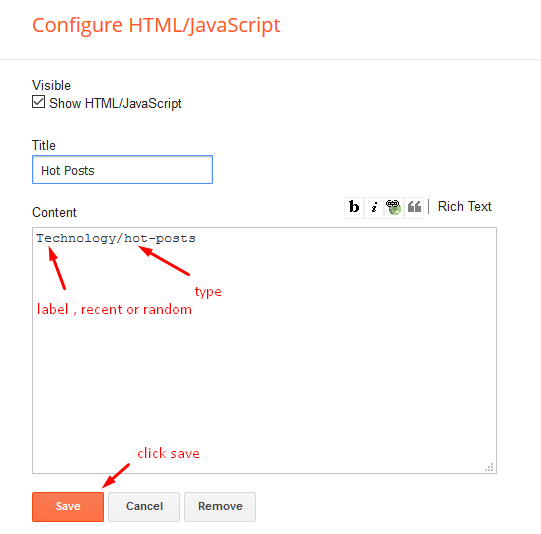
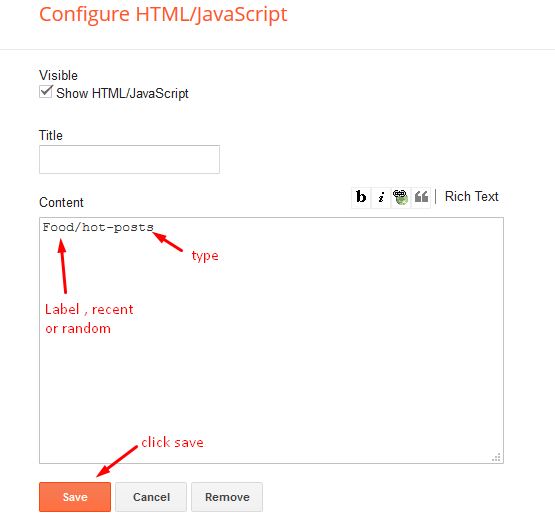
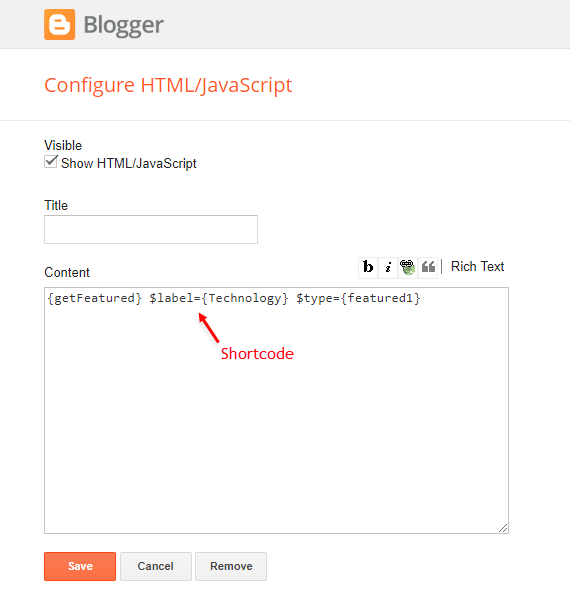
Access your blog Layout > and click on the Add a Gadget > HTML/JavaScript > in the Featured Posts section.
Shortcode Structure: {getFeatured} $label={Your Label} $type={Type} $color={Hex Color}
Shortcode Types: featured1, featured2, featured3, featured4, featured5
Shortcode Label: label or recent
Shortcode Color: $color={Hex Color} is Optional
Shortcode Example: {getFeatured} $label={recent} $type={featured1} $color={#1abc9c}
Hex Colors Site: https://flatuicolors.com/
Widget Settings:
Main Posts
Access your blog Layout > and click on the Edit Icon > in the Main Posts/Blog Posts gadget.
Widget Settings:
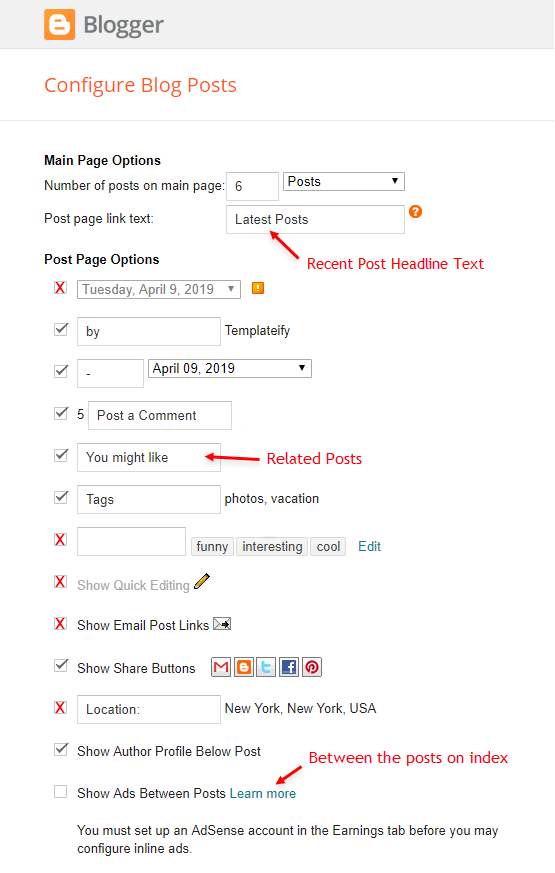
Recent Posts Headline: Replace text for hide to remove the headline
In-Article ADS on "Post Page"
Access your blog Layout > and click on the Add a Gadget > HTML/JavaScript, Image or AdSense > in the sections ADS 1 ( before content ) and ADS 2 ( after content ).
HTML/JavaScript Ex:
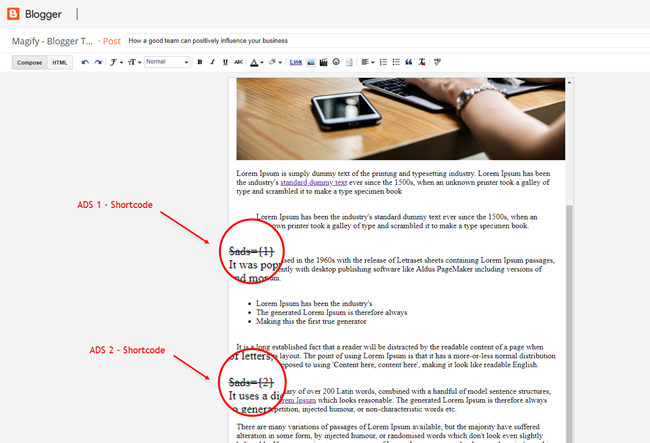
Move ADS 1 and ADS 2 to inside the post content:
Sortcode ADS 1: $ads={1}
Sortcode ADS 2: $ads={2}
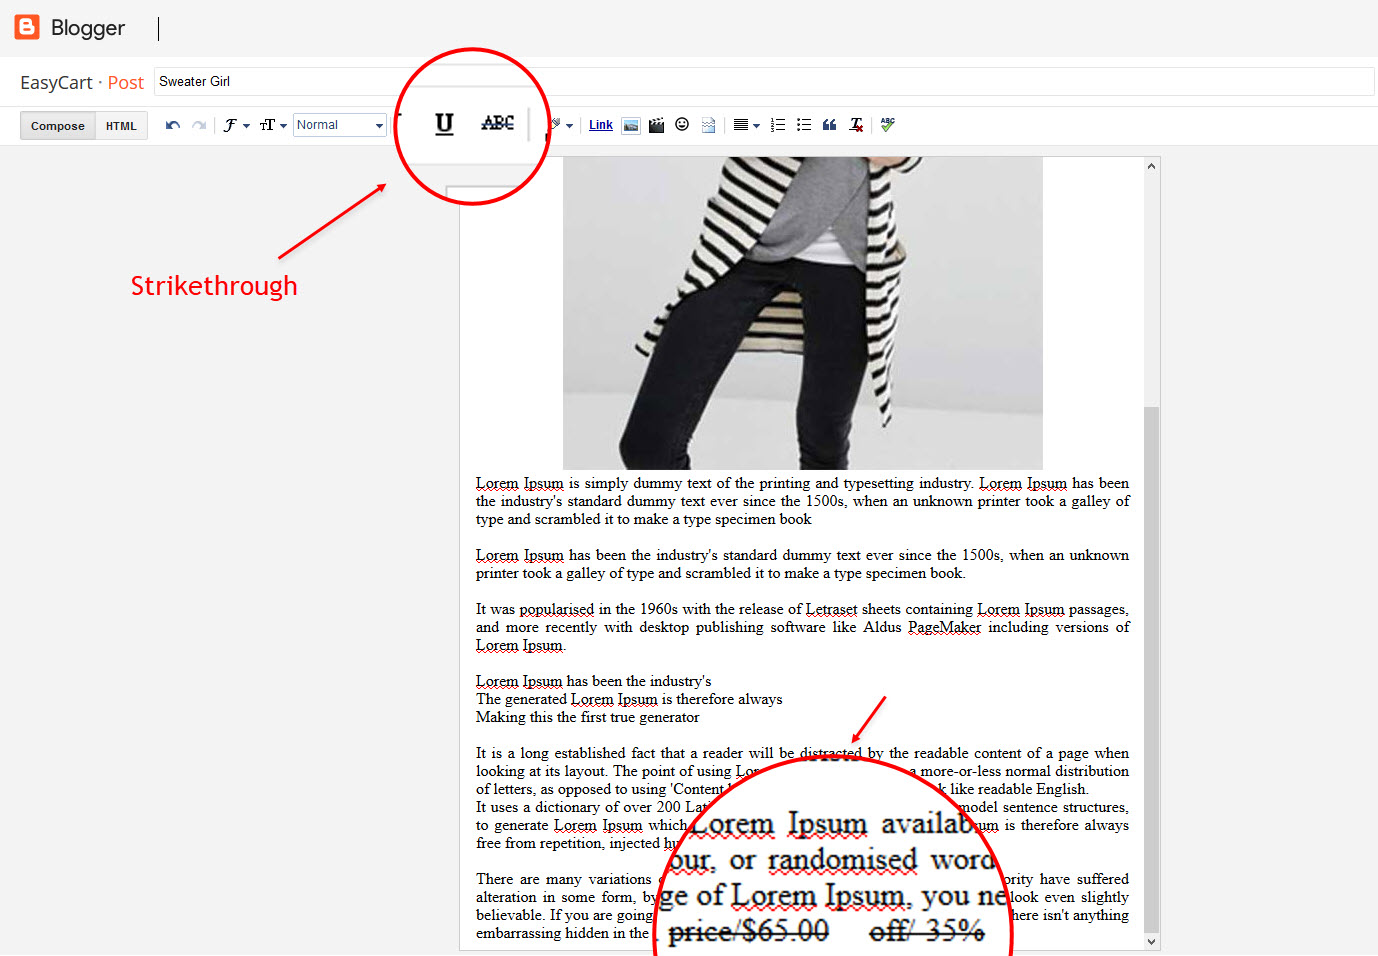
IMPORTANT: After adding a Shortcode apply the Strikethrough style EX: $ads={2}
Example:
IMPORTANT: The ad will only appear if you have inserted in the section, if you want to hide just remove check to not display or remove the gadget.
Home ADS 2
Access your blog Layout > and click on the Add a Gadget > HTML/JavaScript, Image or AdSense > in the section HOME ADS 2.
HTML/JavaScript Ex:
IMPORTANT: This ad will only appear on the Homepage after main posts.
Author Box
The widget receives the blogger profile informations automatically, As long as your profile is marked as public. The icons are displayed if there are links in the description.
Supported Icons: blogger, facebook, facebook-f, twitter, rss, youtube, skype, stumbleupon, tumblr, vk, stack-overflow, github, linkedin, dribbble, soundcloud, behance, digg, instagram, pinterest, pinterest-p, twitch, delicious, codepen, flipboard, reddit, whatsapp, telegram, messenger, snapchat, email, discord, share, external-link
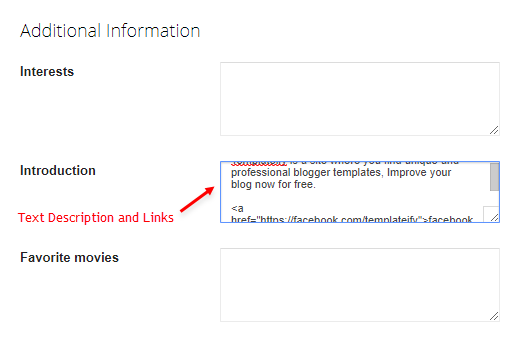
Blogger Settings: Go to https://www.blogger.com/edit-profile.g
Find for Additional Information > Introduction > and add your description with HTML links.
HTML Link Structure: <a href="Your Link Here">Icon Name</a>
HTML Link Example: <a href="https://facebook.com/templateify">facebook</a>
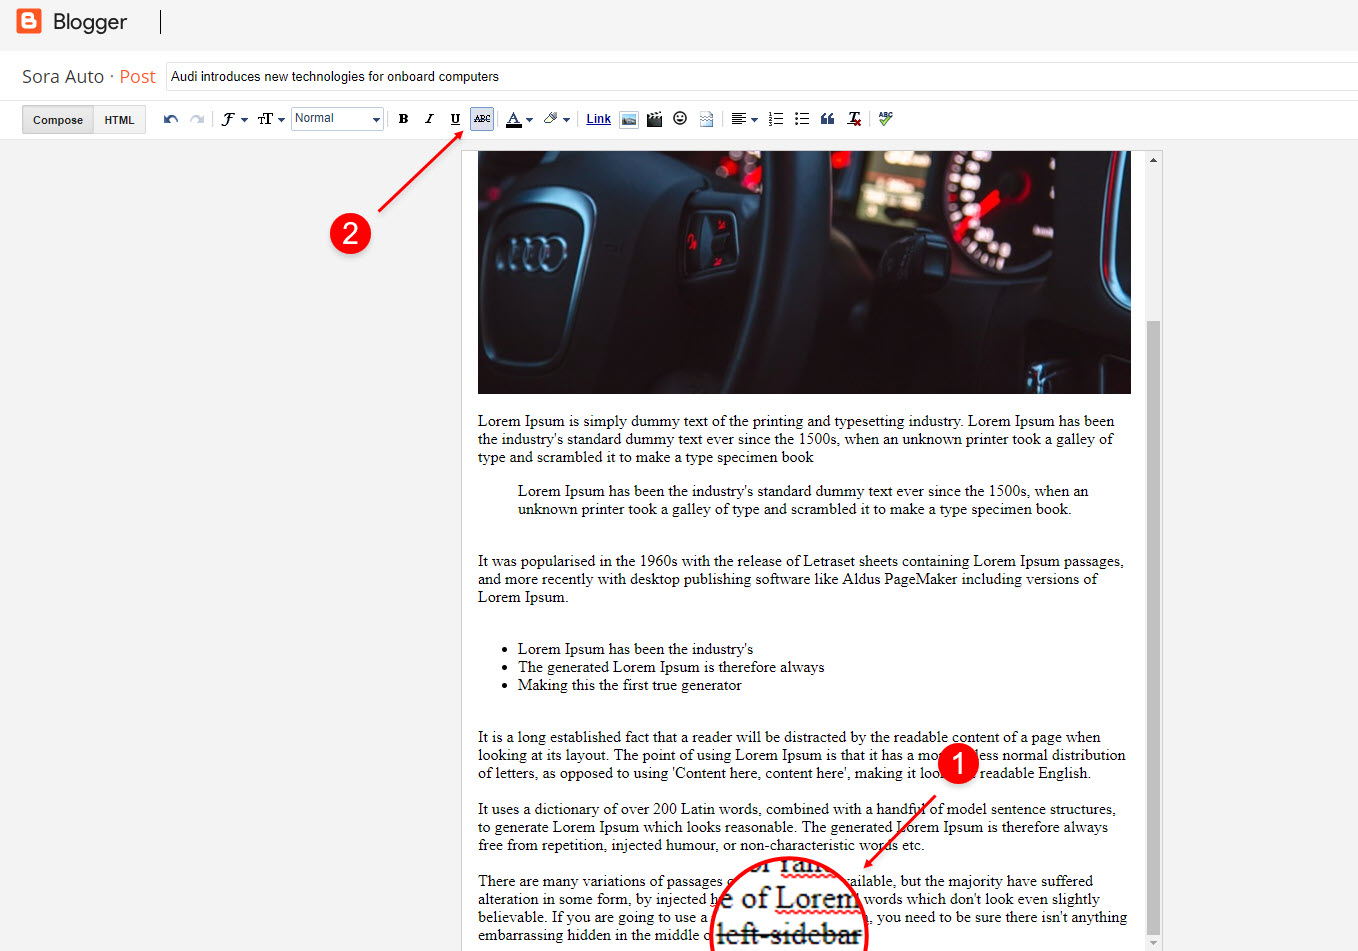
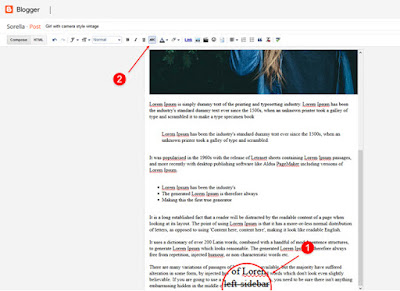
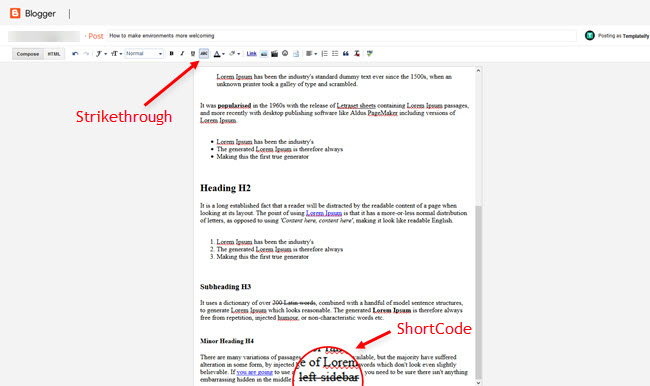
Post Layouts and Contact Form
Full Width: full-width
Left Sidebar: left-sidebar
Right Sidebar: right-sidebar
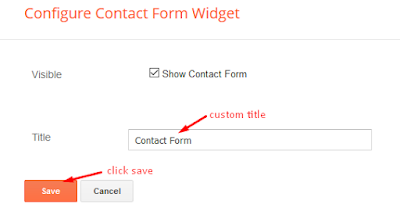
Contact Form: contact-form
Example:
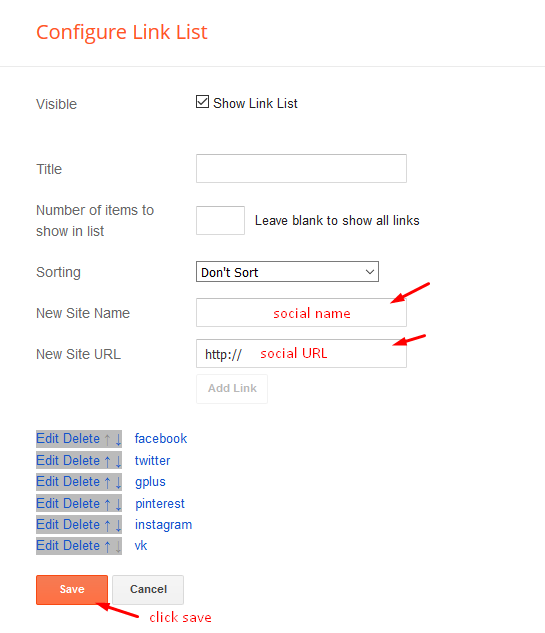
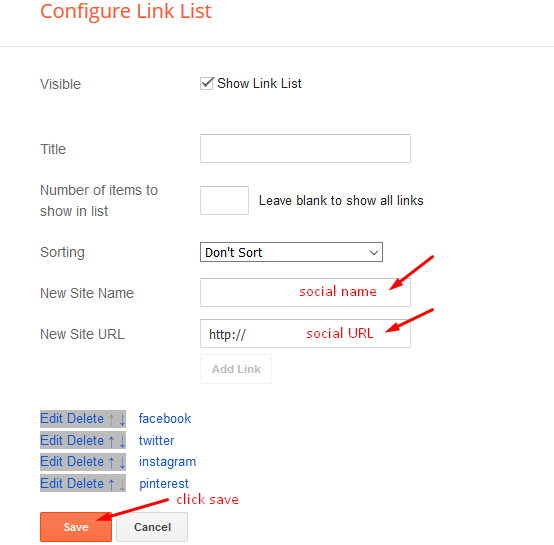
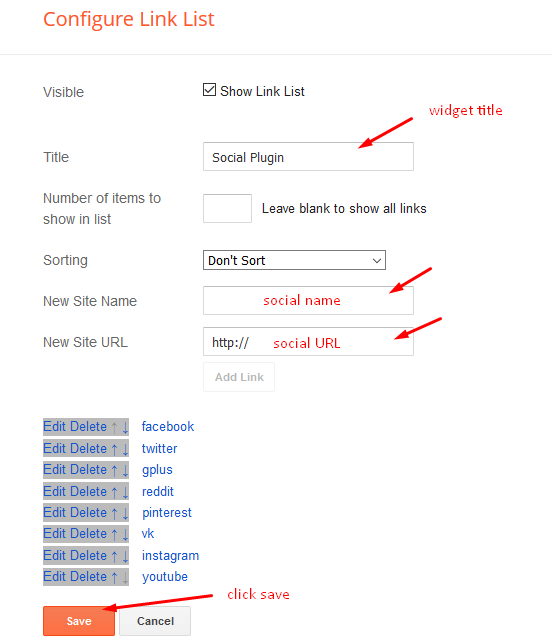
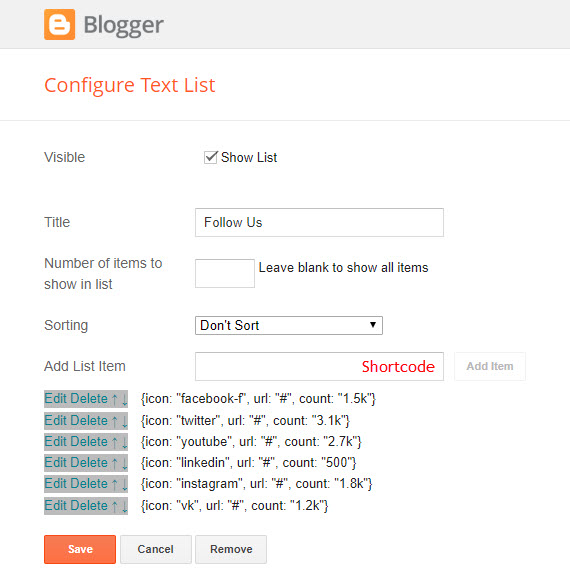
Social Counter
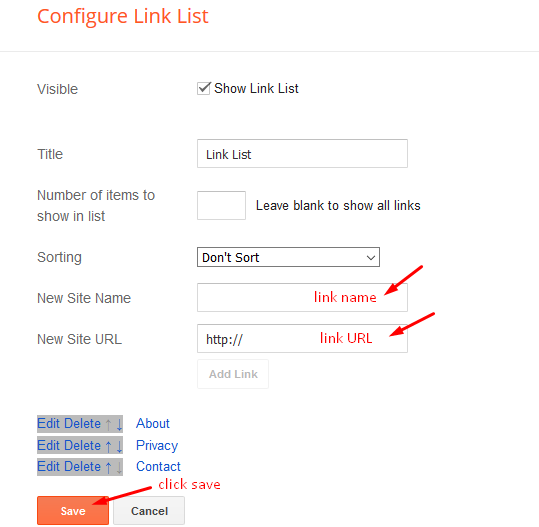
Access your blog Layout > and click on the Add a Gadget > List > in the Sidebar sections.
Icon Shortcode: {icon: "ICON-NAME", url: "LINK-URL", count: "CUSTOM-COUNTER"}
Supported Icons: blogger, facebook, facebook-f, twitter, rss, youtube, skype, stumbleupon, tumblr, vk, stack-overflow, github, linkedin, dribbble, soundcloud, behance, digg, instagram, pinterest, pinterest-p, twitch, delicious, codepen, flipboard, reddit, whatsapp, telegram, messenger, snapchat, email, discord, share, external-link
Widget Settings:
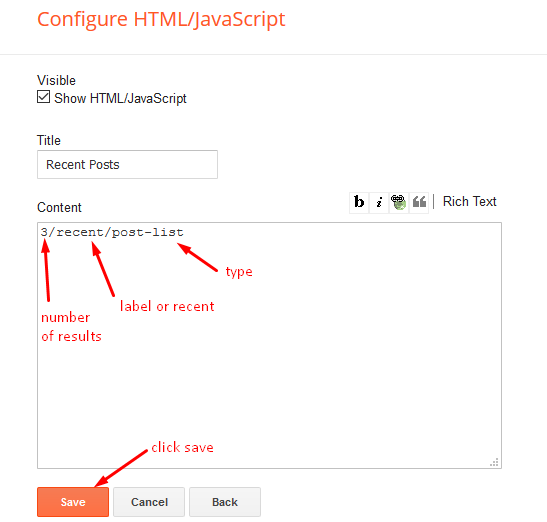
Post Widgets on Sidebar
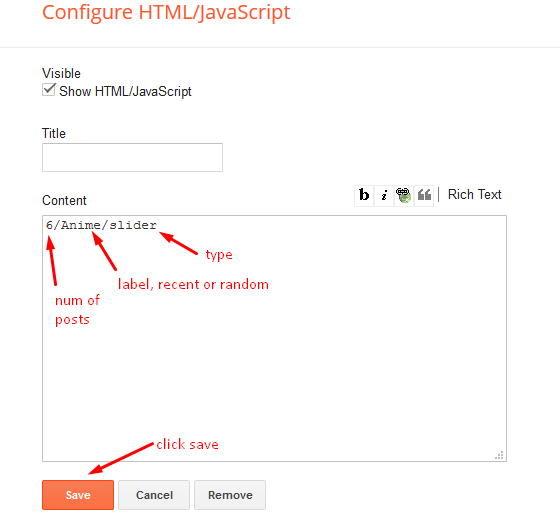
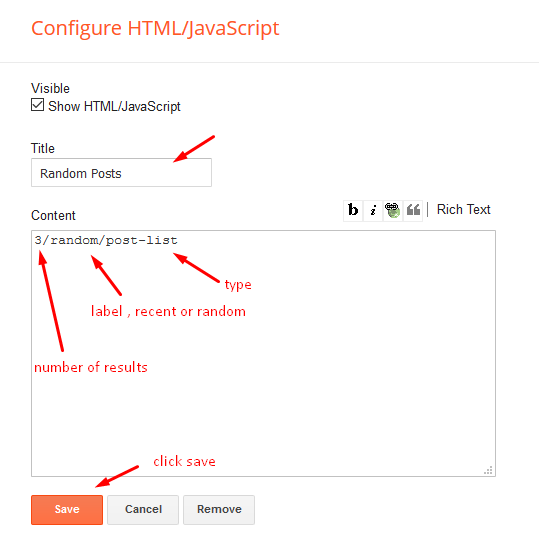
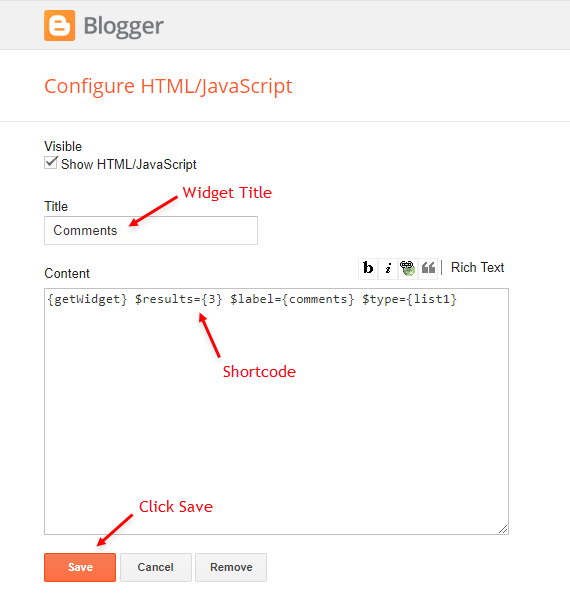
Access your blog Layout > and click on the Add a Gadget > HTML/JavaScript > in the Sidebar sections.
Shortcode Structure: {getWidget} $results={Number of Results} $label={Your Label} $type={Type}
Shortcode Types: side1, list1, list2
Shortcode Label: label, recent or comments (comments works only on type list1)
Shortcode Results: You must add the desired number of results
Shortcode Example: {getWidget} $results={3} $label={comments} $type={list1}
Widget Settings:
Facebook Page Plugin
Access your blog Layout > and click on the Add a Gadget > HTML/JavaScript > in the Sidebar sections.
NOTE: To add the Page Plugin, you will need to install the facebook SDK on your blog, how to install it by clicking here.
Add This Code:
<div class="fb-page" data-href="YOUR FACEBOOK PAGE URL" data-width="500" data-small-header="false" data-adapt-container-width="true" data-hide-cover="false" data-show-facepile="true"></div>
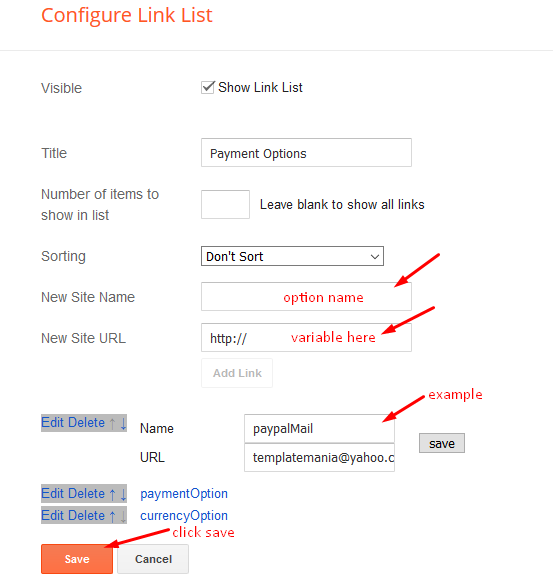
INFO: Replace "data-href" content with your facebook page address, and click save
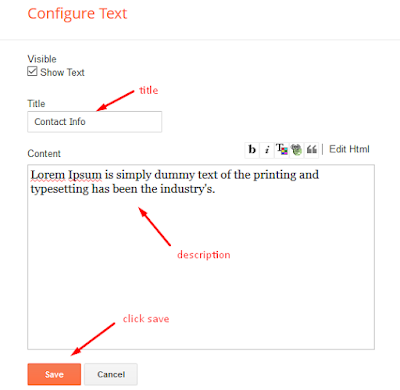
About Section
Access your blog Layout > and click on the Edit Icon > in the About Section gadgets.
1.1 - About Us

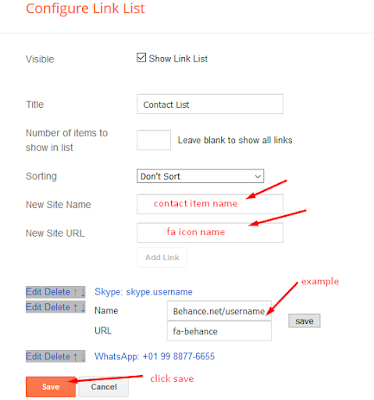
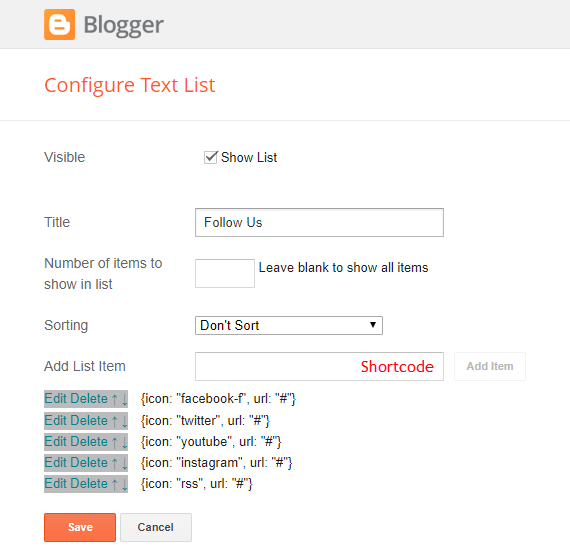
1.2 - Follow Us
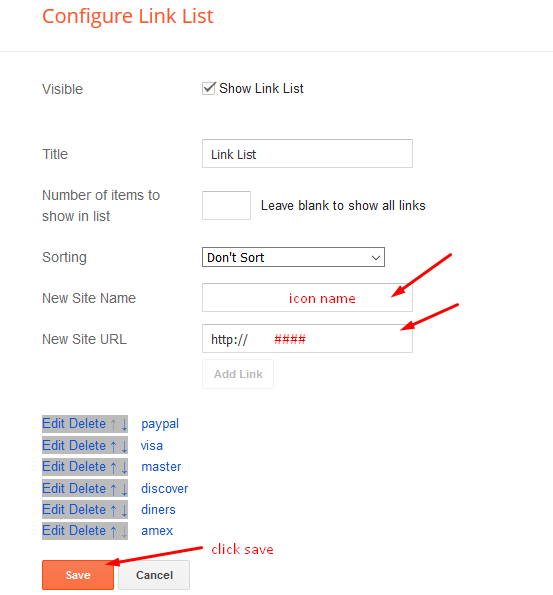
Icon Shortcode: {icon: "ICON-NAME", url: "LINK-URL"}
Supported Icons: blogger, facebook, facebook-f, twitter, rss, youtube, skype, stumbleupon, tumblr, vk, stack-overflow, github, linkedin, dribbble, soundcloud, behance, digg, instagram, pinterest, pinterest-p, twitch, delicious, codepen, flipboard, reddit, whatsapp, telegram, messenger, snapchat, email, discord, share, external-link
Footer Copyright (Premium)
Access your blog Layout > and click on the Edit Icon > in the Footer Copyright gadget.
For normal credits add 'normal' into the space for custom credits add your credits as shown below.
Widget Settings:

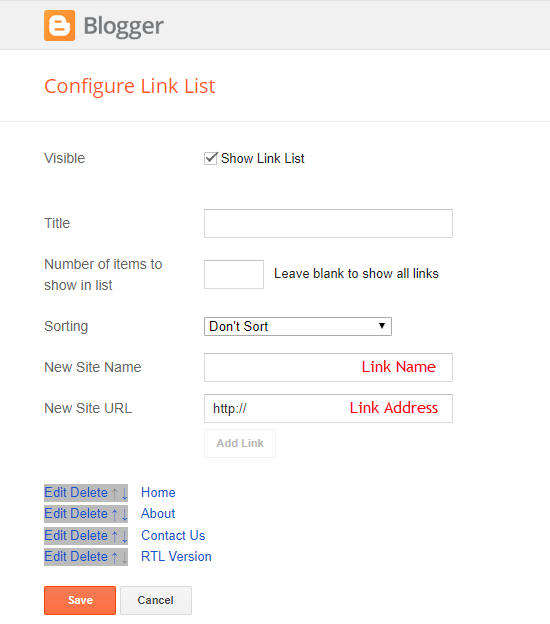
Footer Menu
Access your blog Layout > and click on the Edit Icon > in the Footer Menu gadget.
Widget Settings:

Cookie Consent
Access your blog Layout > and click on the Edit Icon > in the Cookie Consent gadget.
Shortcode: $ok={Button Text} $days={Expires Days}
Shortcode Example: $ok={Accept !} $days={7}
Widget Settings:

Theme Options
1.1 - Facebook SDK
The Page Plugin as well as facebook comments only work if you have the Facebook SDK installed on your theme. See below for the steps to acquire and install the Facebook SDK.
Get SDK:
Step 01: Go to https://developers.facebook.com/docs/plugins/page-plugin/ and click on Get Code button and copy the SDK Script.
Copying SDK:
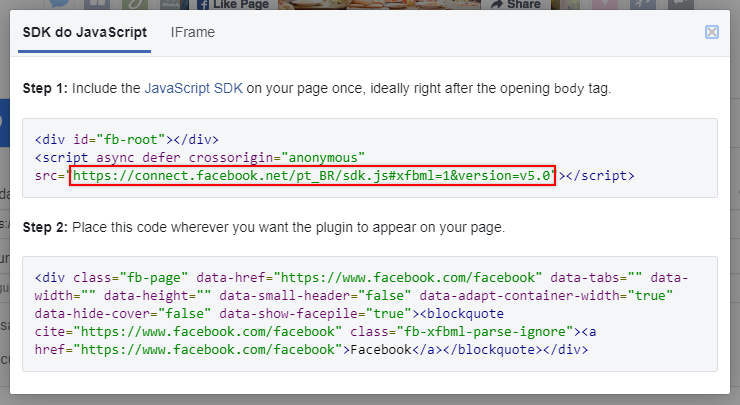
SDK en_US:
https://connect.facebook.net/en_US/sdk.js#xfbml=1&version=v5.0
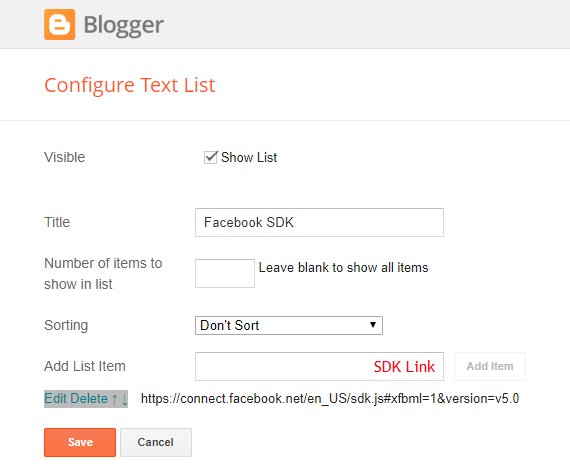
Installing SDK:
Access your blog Layout > and click on the Edit Icon > in the Theme Options > Facebook SDK gadget.
Widget Settings:
1.2 - JSON Variables
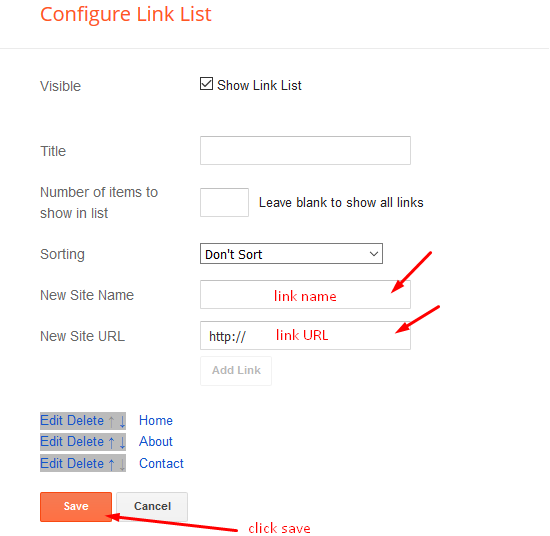
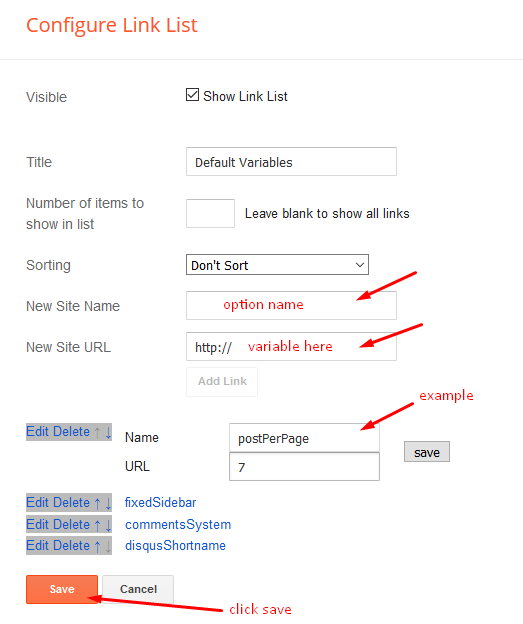
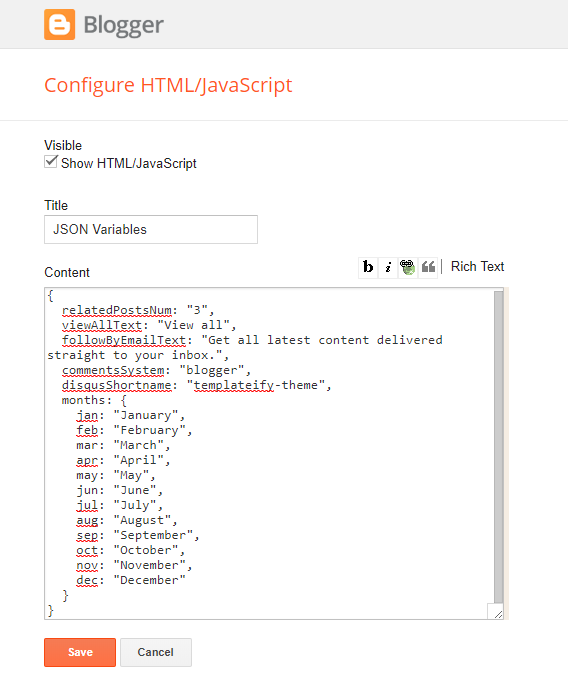
Access your blog Layout > and click on the Edit Icon > in the Theme Options > JSON Variables gadget.
{
  relatedPostsNum: "3",
  viewAllText: "View all",
  followByEmailText: "Get all latest content delivered straight to your inbox.",
  commentsSystem: "blogger",
  disqusShortname: "templateify-theme",
  months: {
    jan: "January",
    feb: "February",
    mar: "March",
    apr: "April",
    may: "May",
    jun: "June",
    jul: "July",
    aug: "August",
    sep: "September",
    oct: "October",
    nov: "November",
    dec: "December"
  }
}
relatedPostsNum: default is 3.
viewAllText: default is View all.
followByEmailText: default is Get all latest content delivered straight to your inbox.
commentsSystem: blogger, facebook, disqus or hide, default is blogger.
disqusShortname: If you add the disqus form, you will then have to add the username of your form, default is templateify-theme.
months: default is "January", "February", "March", "April", "May", "June", "July", "August", "September", "October", "November", "December".
NOTE: To add the Facebook Comments, you will need to install the facebook SDK on your blog, how to install it by clicking here.
relatedPostsNum: "3",
viewAllText: "View all",
followByEmailText: "Get all latest content delivered straight to your inbox.",
commentsSystem: "blogger",
disqusShortname: "templateify-theme",
months: {
jan: "January",
feb: "February",
mar: "March",
apr: "April",
may: "May",
jun: "June",
jul: "July",
aug: "August",
sep: "September",
oct: "October",
nov: "November",
dec: "December"
}
}
Widget Settings:
Site Feed
Access your blog Settings > and click on the Other.
Site Feed Settings:
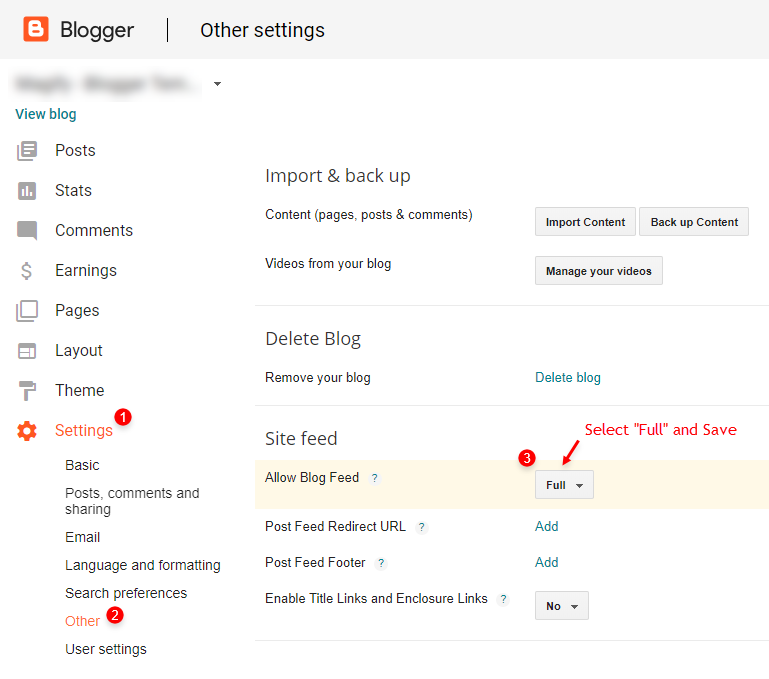
IMPORTANT: For Mega Menu, Featured Posts, Content Blocks, Related Posts, Recent Comments and Recent Posts Widget and others load normally, you must configure the site feed to "Full".
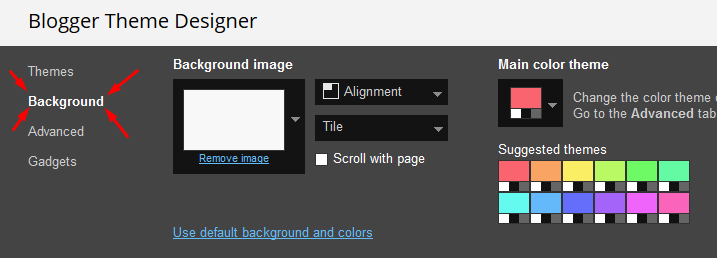
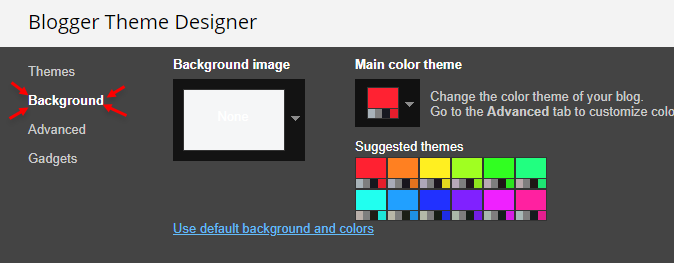
How to Customize This Theme?
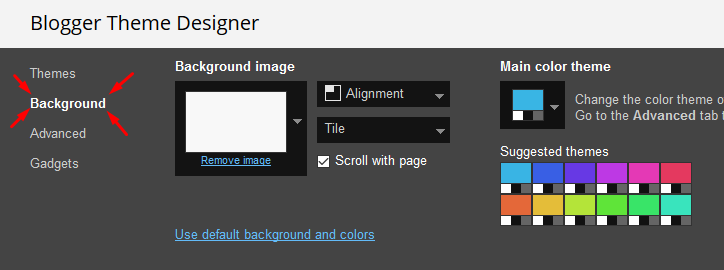
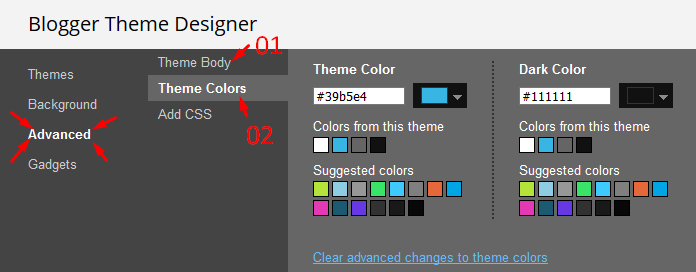
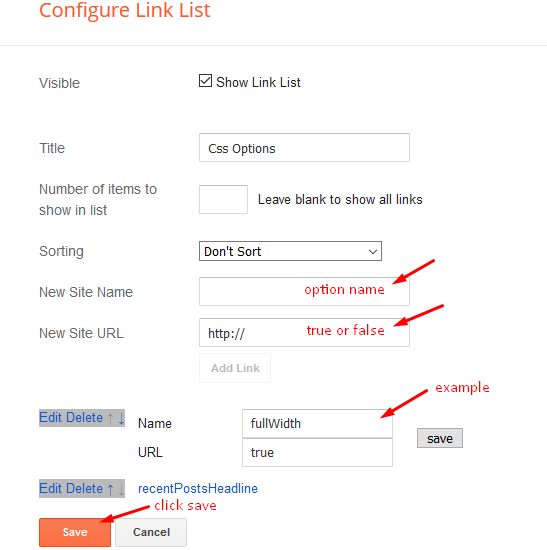
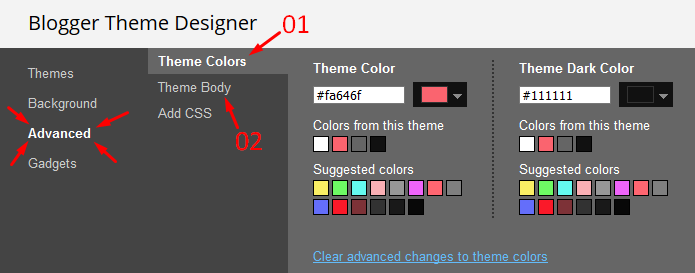
Access your blog Theme > and click on the Customize button > and find Background and Advanced options.
Available customizations: Layout Options, Widths, Colors, Backgrounds, Fonts and more.
Background Example:
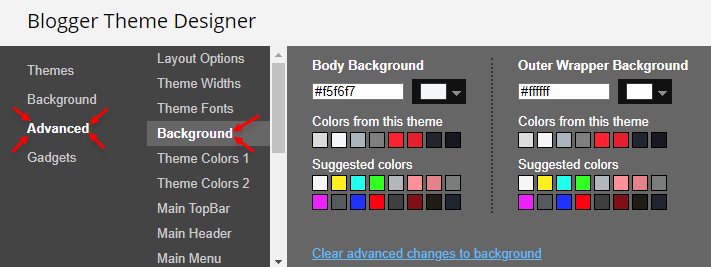
Advanced > Background:
Background Image Size Cover: 0 is false and 1 is true.
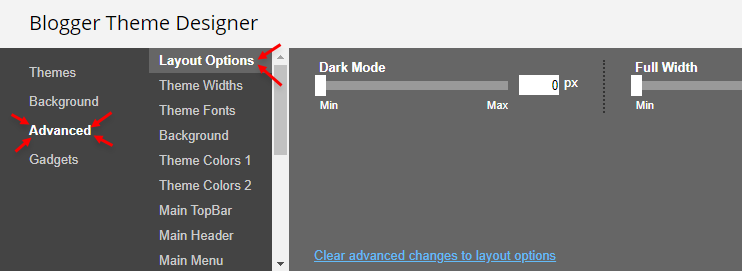
Advanced > Layout Options:
Dark Mode: 0 is false and 1 is true.
Full Width: 0 is false and 1 is true.
Left Sidebar: 0 is false and 1 is true.
Fixed Menu: 0 is false and 1 is true.
Fixed Sidebar: 0 is false and 1 is true.
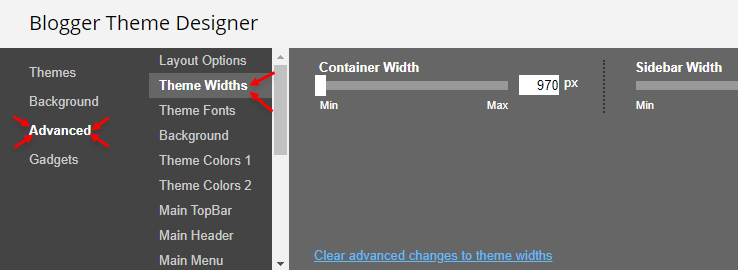
Advanced > Theme Widths:
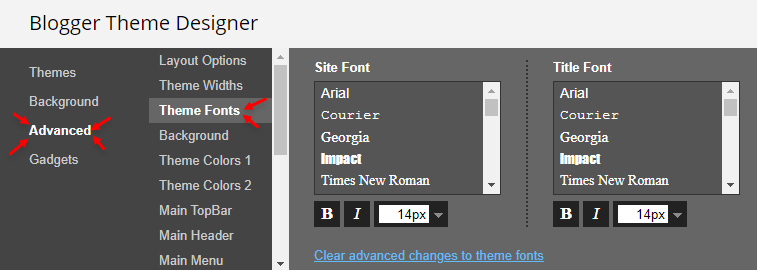
Advanced > Theme Fonts:
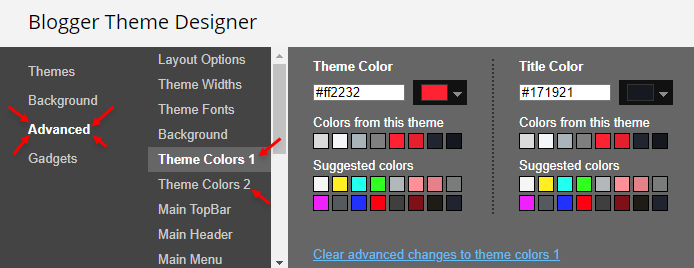
Advanced > Theme Colors:
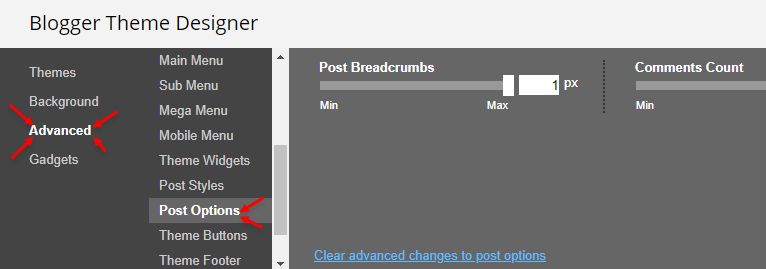
Advanced > Post Options:
Post Breadcrumbs: 0 is false and 1 is true.
Comments Count: 0 is false and 1 is true.
Post Navigation: 0 is false and 1 is true.
Facebook Comments Dark Mode: 0 is false and 1 is true.
Installation And Custom Services
We provide plenty of templates for free but if you want something unique for your blog then let us create a unique design for your blog, Just tell us your needs and we will convert your dream design into reality. We also Provide Blogger Template Installation Service. Our Installation service gives you a simple, quick and secure way of getting your template setup without hassle.